These Chubby Hubby Cookies are homemade salty, sweet cookies that are filled with chocolate-covered peanut butter pretzels, chocolate, and peanut butter chips! Makes a dozen delicious cookies in just under an hour!
Treat yourself to another Chubby Hubby recipe, such as these Peanut Butter Pretzel Bites! These salty, sweet snack sandwiches have a creamy peanut butter filling stuffed between Snaps pretzels and then dipped in melted chocolate!
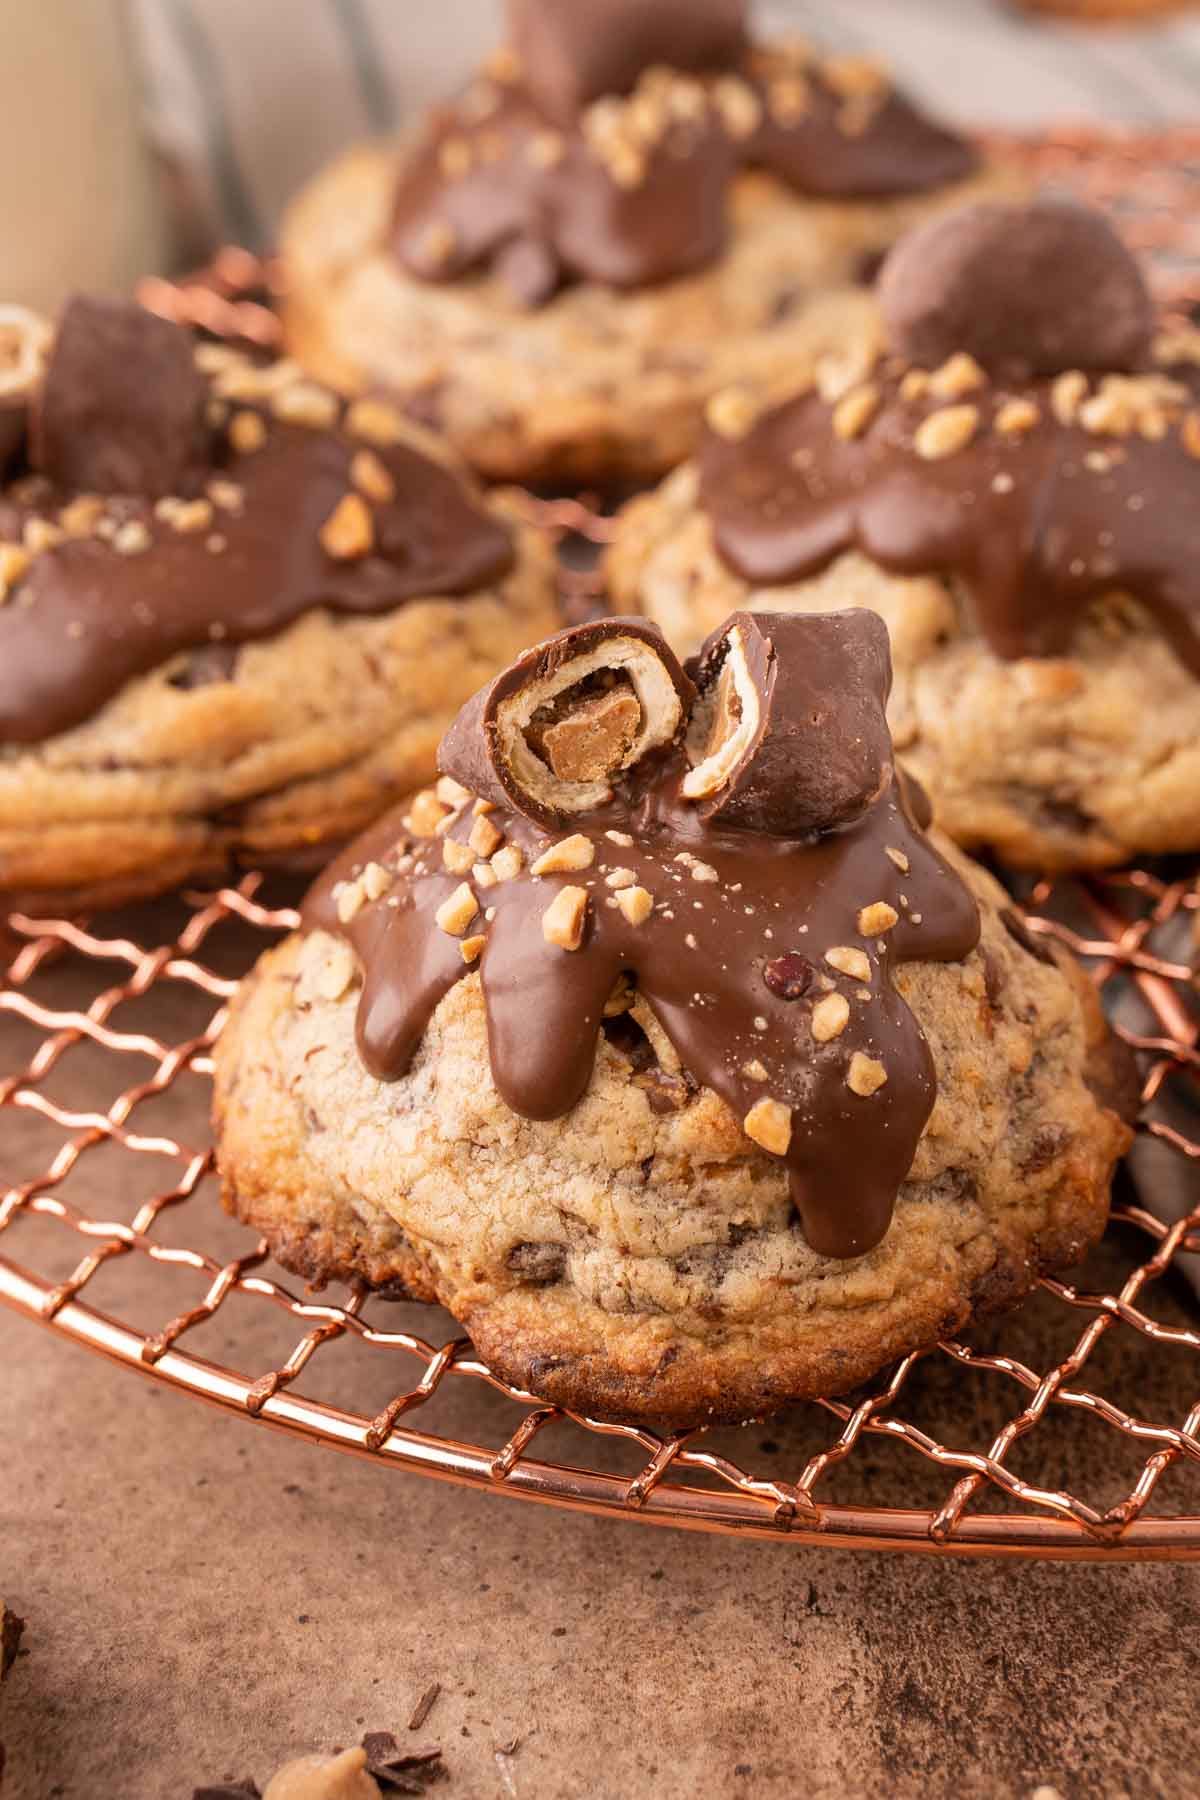
These Homemade Chubby Hubby Cookies are an absolute showstopper, from their taste to their dressed-up appearance! Because when a cookie tastes this good, you have to go all out with toppings too!
These mouthwatering cookies are filled with salty, sweet flavor! Making it the ultimate snacking treat that friends and family will devour in record time!

I’m excited to share this cookie recipe as part of the Good Cookie Valentine’s Event! This event raises money for Cookies For Kids’ Cancer, which is an organization focused on funding pediatric cancer research, a severely underfunded area of medicine in our country. You can make a difference in a few ways:
- Host a bake sale to fundraise for the cause!
- Purchase cookies – YUM!
- Donate Here – we have a partner matching the first $3000 we raise!
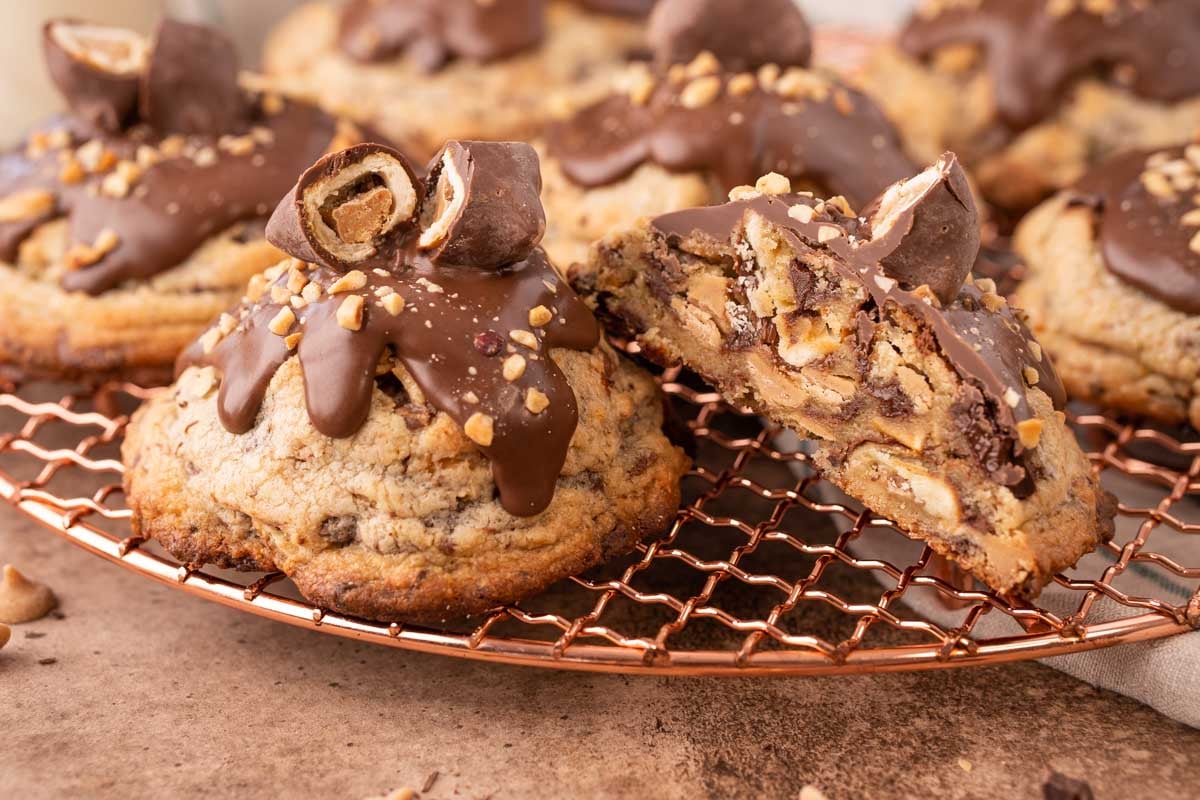
All About Chubby Hubby Cookies
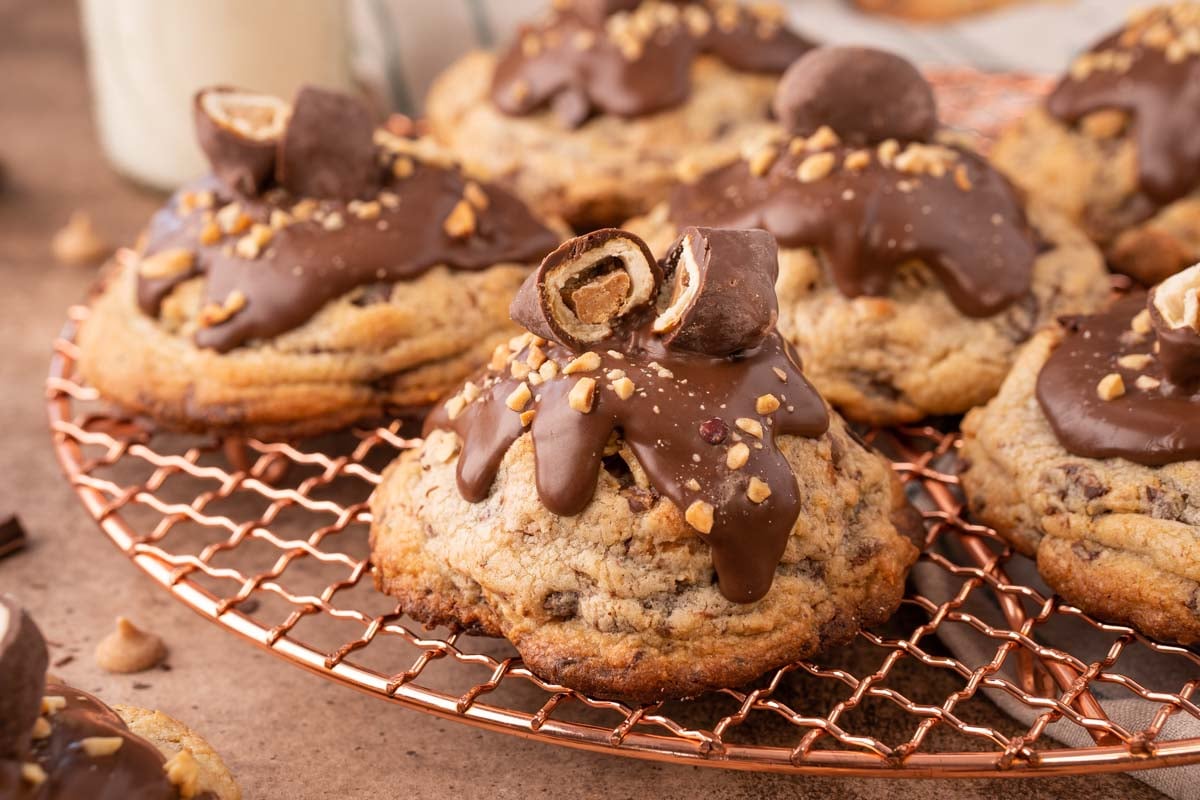
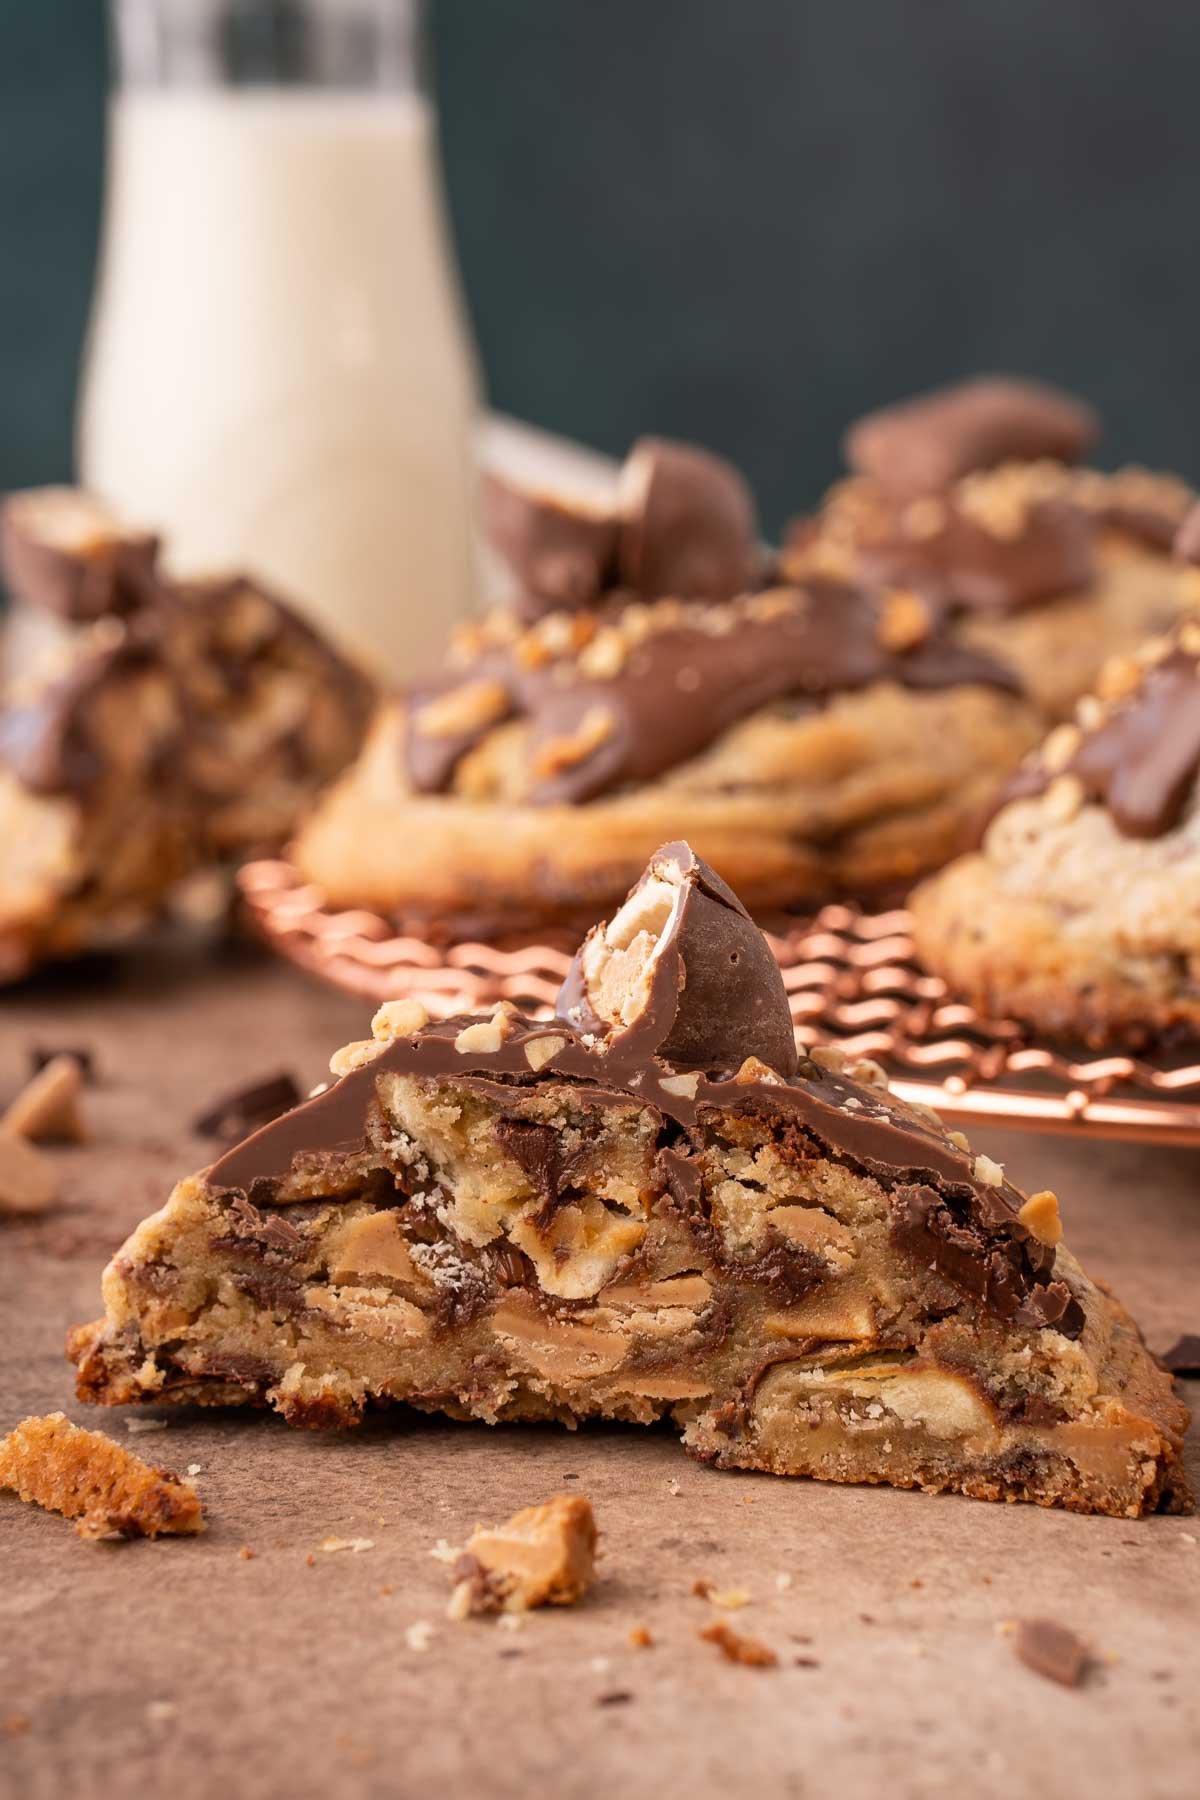
Taste: These Chubby Hubby Cookies are overflowing with the similar flavor that’s found in the iconic Ben & Jerry’s Chubby Hubby Ice Cream! The dough is made with vanilla bean paste and malted milk powder to achieve that ice cream flavor. These cookies are filled with chocolate, peanut butter chips, chopped peanut butter pretzel nuggets, and then topped with melted chocolate, chopped peanuts, and a chocolate-covered peanut butter pretzel nugget! They really are gourmet!
Texture: The homemade cookie has a satisfying crispy outside with a soft, moist inside! You’ll get a crunchy bite that’s filled with melty chips, crunchy pretzels, a smooth chocolate topping, and a pretzel nugget finish! If you prefer to enjoy your cookies warm, so they’re gooey, I would recommend skipping the toppings. At room temperature, these cookies are thick and firm but still soft.
Key Ingredients
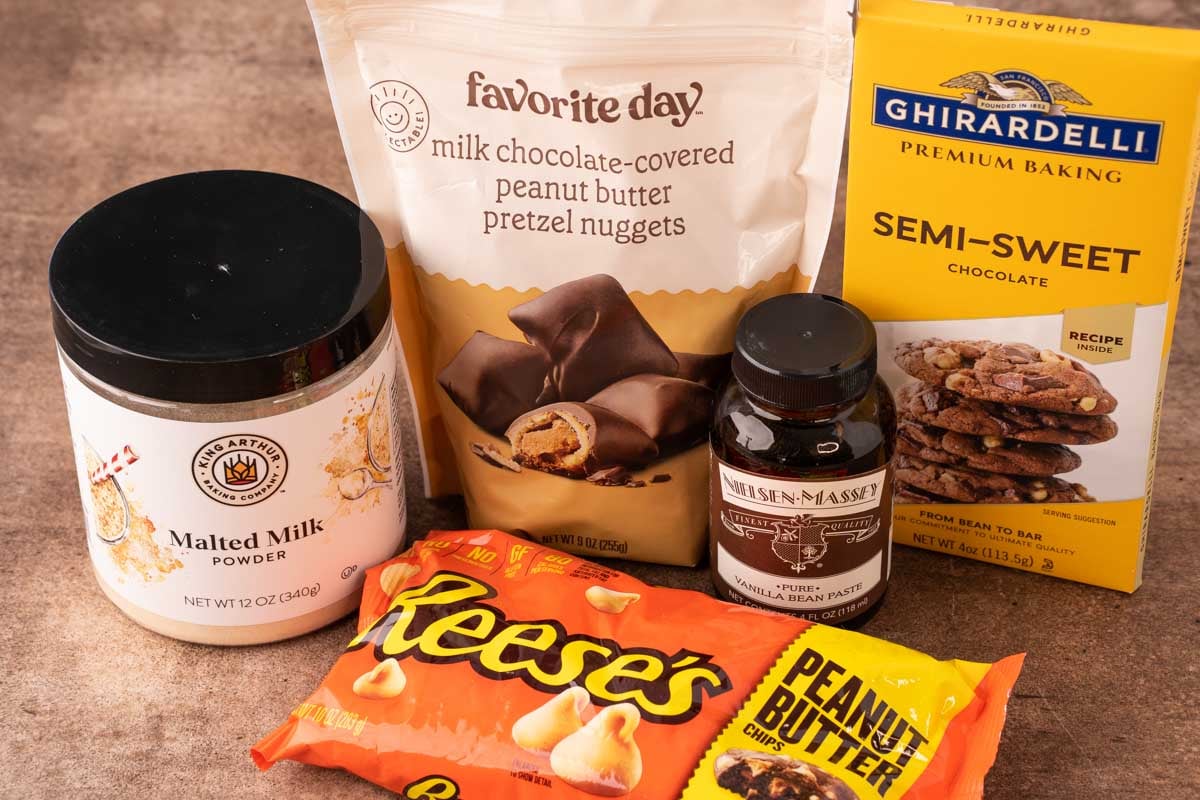
Let’s talk about the ingredients that make this cookie so unique and make it a Chubby Hubby Ice Cream Cookie! I’ve included affiliate links for where I purchased the ingredients to make it easier for you to shop for them too.
Vanilla Bean Paste – For a strong ice cream-like flavor, I recommend using vanilla paste, but you could use extract if that is all you have on hand.
Malted Milk Powder – The base of the ice cream is malted vanilla, so malted milk powder is worked into the dough. And it makes it smell amazing!
Chocolate Covered Peanut Butter Pretzels – These are the main add-in to the ice cream, so we chopped them up and mixed them into the dough – DELICIOUS!
Baking Chocolate – This represents the chocolate fudge swirl in the ice cream. I recommend using chopped baking chocolate because it melts better, but you can use chocolate chips if you want. You could use semi-sweet or bittersweet.
Peanut Butter Chips – These make up the peanut butter swirl and really push these cookies over the top in flavor!
Measuring Ingredients
One look at the recipe card may have you wondering why they include the weighted measurement for ingredients as well. This is included because using a kitchen scale (affiliate link) is the most accurate way to ensure the ingredient measurements are correct.
Too much or too little of an ingredient can throw the entire taste or even structure of the cookie off. If measuring out all of the ingredients by grams is too much for you, then at the very least, I’d suggest measuring out the all-purpose flour and cake flour.
Learning How To Correctly Measure Flour will be a game-changer for all of your cookie recipes! This is because it’s so easy to accidentally put in way too much flour since the go-to method is to scoop from the bag and pack it into the cup.
This will almost always result in too much flour, which will leave you with cookies that are too dry and crumbly. And no one likes dry, crumbly cookies!
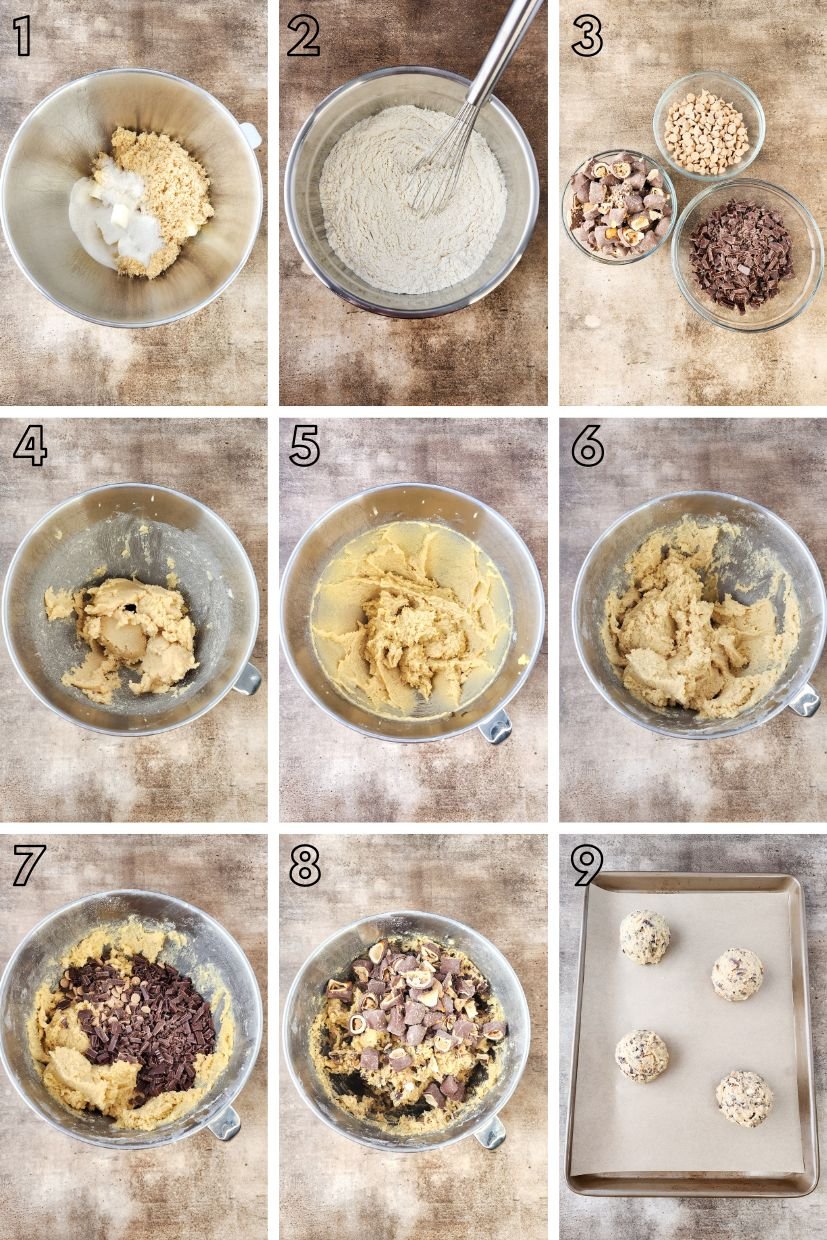
Helpful Recipe Tips And Tricks!
- Cold Butter – Using cold butter in this cookie recipe is necessary to support the overall structure of the cookie. The cold butter creates a cookie with a crispy outside yet a tender, flakey layered inside! A delicious combination that you won’t experience if you use room temperature or melted butter.
- Stand Mixer – Mixing up this cookie dough is much easier to do with a stand mixer instead of by hand or a hand mixer. This is because the recipe is made with cold butter, making it more difficult to cream butter properly by hand. It also makes a lot of dough, which can be hard to work with.
- Portioning – I like making specialty cookies like these to be uniform in size. Therefore, I use a kitchen scale to separate the dough out into 6-ounce portions. After I have it measured out, I like to still use a cookie scoop to shape it since the dough is fairly soft.
- Chilling – For best results, place the portioned dough onto a parchment-lined baking sheet and place the sheet of cookies into the fridge to chill for 15 minutes. We found that chilling the pan with the cookies resulted in a much better baked and structured cookie. To keep the process quick, while the first batch chills in the fridge, weigh out the dough and prepare a second pan of cookies. That way, when the chilled cookies are ready to bake, you can slide in the second batch of cookies to chill while the first batch bakes.
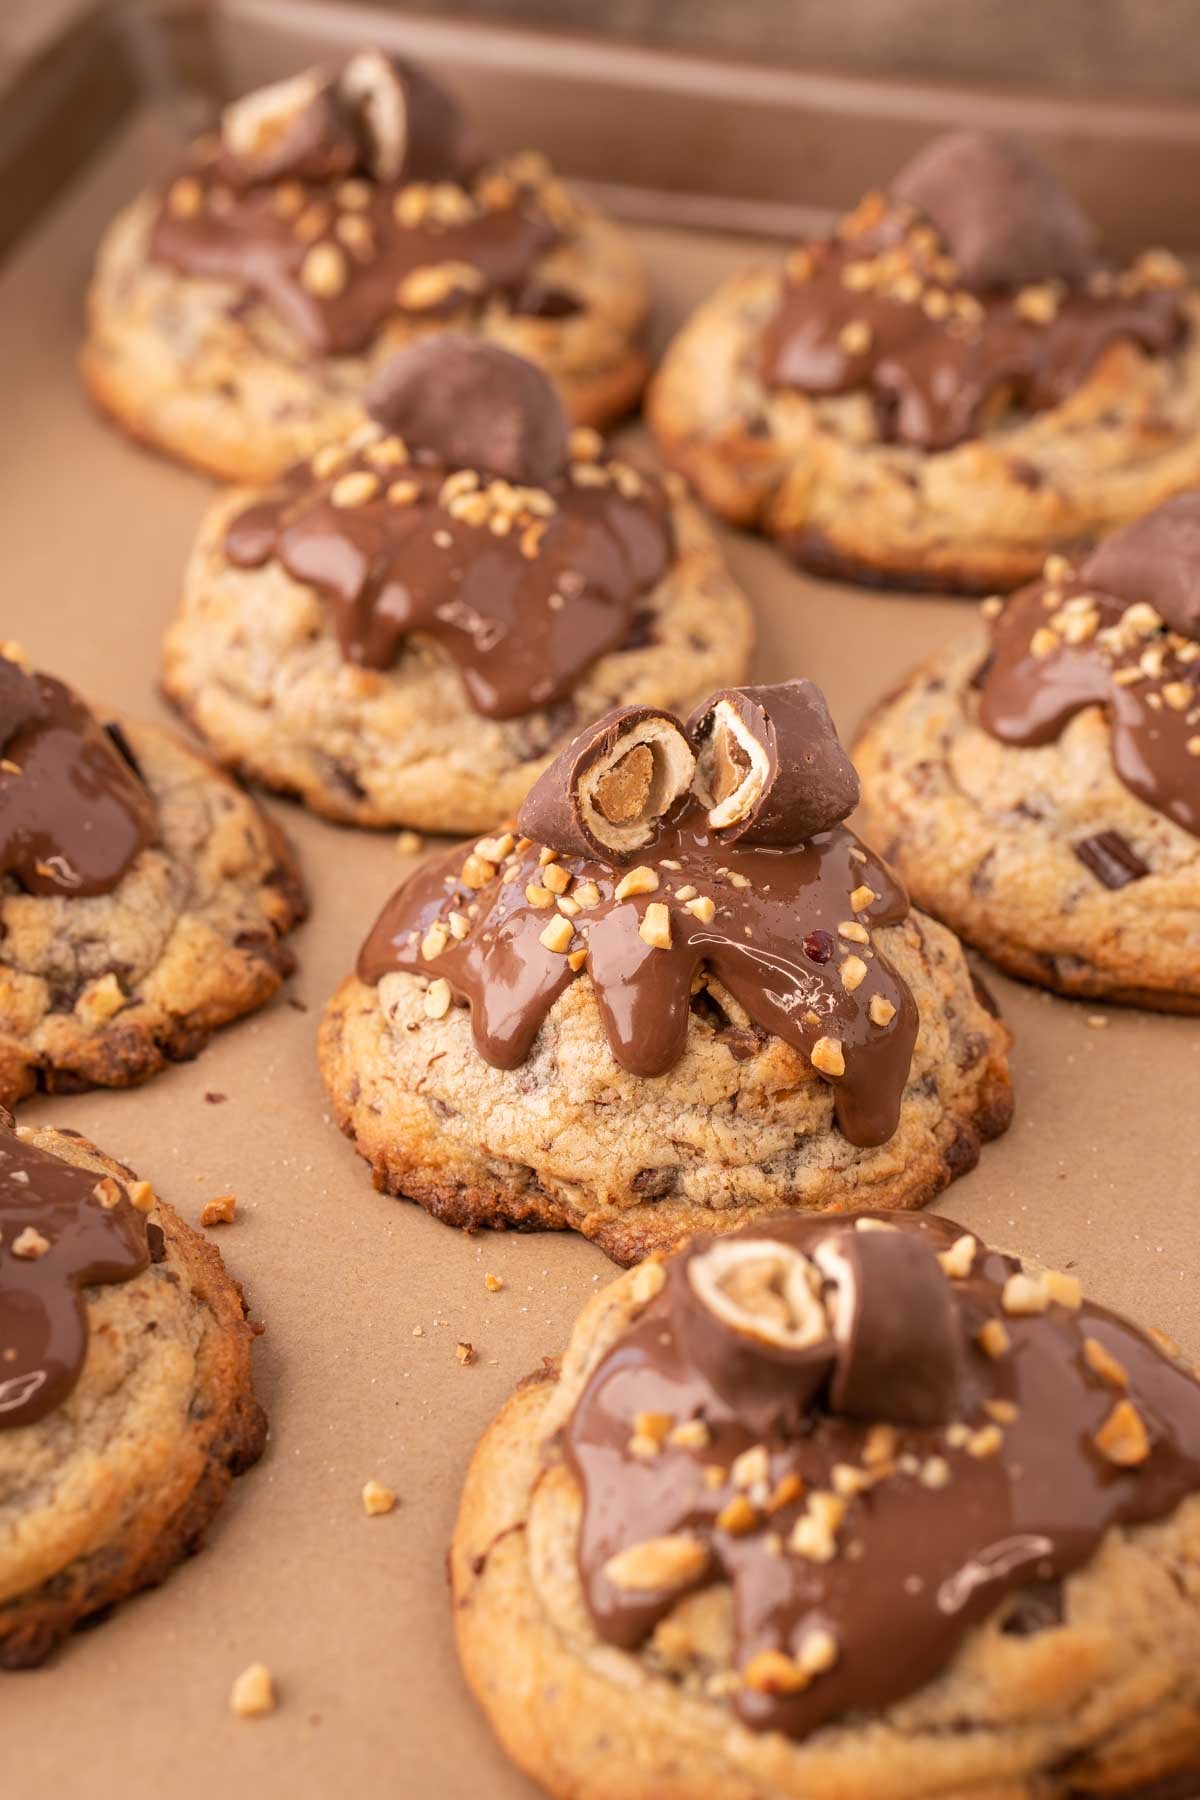
Homemade specialty cookies like these are so fun to make right at home! The delicious final result is always enough to encourage me to make other recipes!
If you’re also a lover of specialty cookies, then you’ll definitely want to check out some of my Crumbl cookie copycat recipes! My Cookie Dough Cookies and Key Lime Pie Cookies are ones that you don’t want to miss out on!
Though my Chocolate Milkshake Cookies and Churro Cookies are both fancier treats that I also love to make too! I say fancy, but both recipes still just take 30 minutes of hands-on prep time!
Alternative Baking Option
These cookies were adapted from my Levain Cookie recipe, which is meant to be crispy on the outside and gooier in the middle. If you prefer a more even cookie, feel free to bake these at 375 degrees F for 14 to minutes instead. This will yield flatter cookies overall, so you may lose that “ice cream scoop” appearance.
Storage Instructions
Place cooled cookies into an airtight container in a single layer since stacking the cookies could ruin the toppings on them! Store the cookies at room temperature and eat them up within four days!
Can I Bake The Cookies And Then Freeze Them To Enjoy Later?
Absolutely! To do so, allow the cookies to cool completely after baking. Then, place them on a baking sheet to flash freeze in the freezer.
Afterward, transfer them to a freezer bag and squeeze out the excess air. Store them in the freezer for up to 3 months.
To enjoy, thaw them at room temperature and then nuke them for 15 seconds in the microwave.
Can I Just Make The Cookie Dough To Freeze And Bake Later?
Yes, you can just freeze the cookie dough to bake later! First, place portions of the dough onto a parchment-lined baking sheet. Next, transfer the baking sheet to the freezer to flash-freeze the dough balls.
Afterward, place the frozen dough balls into a freezer bag and squeeze out the excess air. Store the dough for up to 3 months in the freezer.
When you’re ready to bake the cookie dough, transfer them from the freezer into the fridge to thaw. Then, bake them for 9 to 10 minutes.
Can I Use Salted Butter In This Cookie Recipe?
Yes, just swap the unsalted butter out for an equal amount of salted butter and then reduce the additional salt to 3/4 teaspoon.
Does The Recipe Need To Be Adjusted If I Use Medium-Sized Eggs?
No, this recipe can be made with medium eggs without requiring any further adjustments.
Let’s Connect!
If you’ve tried this recipe, please let me know how you liked it in the comments below and leave a review. I love hearing from you!
Don’t forget to tag me – @sugarandsoulco – on Instagram and Pinterest with your photos or join our Sugar & Soul Show-offs Community and share them there, where you can join our recipe challenges!

Chubby Hubby Cookies
Ingredients
- 1¾ cups cake flour 230g
- 2 cups all-purpose flour 275g
- 3 tablespoons malted milk powder 35g
- 1 tablespoon corn starch 8g
- 1½ teaspoons salt 5g
- ½ teaspoons baking soda 6g
- 1¼ cups cold unsalted butter 280g, 20 tablespoons
- 1⅓ cups light brown sugar 285g, packed
- ½ cup granulated sugar 115g
- 2 large eggs
- 3 additional large egg yolks
- 1 tablespoon vanilla extract
- 9 ounces chocolate covered peanut butter pretzel nuggets 255g, plus more for topping (optional)
- 8 ounces semi-sweet chocolate 250g, chopped
- 1 cup peanut butter chips 165g
- 10 ounces chocolate melting wafers optional
- 3 tablespoons chopped peanuts optional
Instructions
- Preheat the oven to 425°F (NOT A TYPO). Line 2 to 3 baking sheets with parchment paper and set aside.
- Whisk together the cake flour, all-purpose flour, malted milk powder, cornstarch, salt, and baking soda in a medium bowl. Set aside.1¾ cups cake flour, 2 cups all-purpose flour, 1 tablespoon corn starch, 1½ teaspoons salt, ½ teaspoons baking soda, 3 tablespoons malted milk powder
- In a stand mixer fitted with a paddle attachment, cream together the cold butter and sugars. Mix at medium-high speed until smooth, about 3 to 4 minutes, scraping down the sides of the bowl about every minute.1¼ cups cold unsalted butter, 1⅓ cups light brown sugar, ½ cup granulated sugar
- Once combined add in the eggs one at a time followed by the egg yolks. Then mix in the vanilla extract.2 large eggs, 3 additional large egg yolks, 1 tablespoon vanilla extract
- Once smooth, add the flour mixture a little at a time until smooth.
- Add in the chopped chocolate and peanut butter chips. Mix just until combined.9 ounces chocolate covered peanut butter pretzel nuggets, 8 ounces semi-sweet chocolate, 1 cup peanut butter chips
- Roughly chop the chocolate covered pretzels and fold them into the mixture by mixing for about 5 seconds on the stir setting or using a rubber spatula.
- Weigh each dough ball out to 5.8 oz and place on a parchment-lined baking sheet and refrigerate for 15 minutes. If baking at the higher temperature, you can probably bake 6 cookies on a hald-sheet pan. If baking at the lower temperature mentioned in the notes, you'll only be able to bake 4 at a time.
- While the first batch chills, prepare the second batch on another cookie sheet and place it in to chill when you take the first batch out to bake.
- Bake for 9 to 11 minutes.
- Allow them to set on the pan for a couple of minutes before transferring to a wire rack to cool completely.
- Once cooled, melt the chocolate melting wafers in a microwave-safe bowl at 30-second intervals, stirring between each one, until fully melted.10 ounces chocolate melting wafers
- Spoon melted chocolate over the top of the cooled cookies, then sprinkle with chopped peanuts and top with a chocolate-covered peanut butter pretzel. Let harden at room temperature or pop in the refridgerator for 10 to 15 minutes.3 tablespoons chopped peanuts, 9 ounces chocolate covered peanut butter pretzel nuggets
Video
Notes
- You can bake the cookie dough at 375F for 14 minutes for an overall softer cookie and more even bake – they will be flatter and not as domed.
- Medium eggs can be used in this recipe without any further adjustments.
- Once baked and cooled, these cookies can be stored in an air-tight container for up to four days.
- If using salted butter, reduce the added salt to 3/4 teaspoon.
- Do not use room temperature or melted butter in these cookies – cold butter only.
- We found that for the best results, the cookie sheets should be chilled for 15 minutes with the dough. So if you portion out four cookies on a baking sheet and chill for 15 minutes, then pop them in the oven, you can prep the other cookies while the first batch chills, and then they should be ready to go in the fridge when the first batch goes in the oven then they go in the oven when the first batch comes out. This recipe makes 12 cookies, so you’re looking at three batches/cookie sheets in total.
- To make sure the cookies are uniform in size, it’s best to use a kitchen scale. This is also the best way to ensure that your ingredient measurements are correct by using grams instead of cup measurements. This is our favorite kitchen scale (affiliate link).
- These cookies are 5.8 ounces each, and while a kitchen scale is necessary to make sure your weighted measurement is correct, the dough is fairly soft, and using a cookie scoop will help portion it out and shape it. We used our Vollrath No.8 Scoop (affiliate link) and made sure it was a heaping scoopful instead of leveling it off. Most scoops hit the 5.8-ounce mark, but we took away or added a little cookie dough if needed.
- I highly recommend using a stand mixer for this cookie recipe instead of mixing by hand or with a hand mixer. Since this recipe uses cold butter, it is much more difficult to cream properly, so a stand mixer with a paddle attachment (affiliate link) is the best way to get the job done.
- How To Freeze Dough: Portion the dough out onto a parchment-lined baking sheet (the balls can be close together) and flash freeze for 1 hour. Transfer to a freezer bag and remove any excess air and freeze for up to 3 months. Remove from the bag before thawing in the fridge so the dough doesn’t stick to the bag. Bake for 9 to 10 minutes once thawed.
- How To Freeze Baked Cookies: Let the cookies cool completely after baking, then flash freeze for 30 minutes on a baking sheet to make sure the exterior bits of chocolate is firm and reduce the risk of making a mess. Transfer the cookies to a freezer bag and remove as much excess air as possible before freezing for up to 3 months. Thaw at room temperature a nuke in the microwave for 15 seconds before enjoying.
Nutrition
Did You Make This Recipe?
Don’t forget to share it with me on Instagram @sugarandsoulco and follow on Tiktok @sugarandsoulco and Pinterest @sugarandsoulco for more!
Check out more delicious cookie recipes as part of this event!
- Heart-Shaped Homemade Pop Tarts from The Little Kitchen
- Valentine Cupid Crunch from Ever After in the Woods
- Easy Dark Chocolate Cherry Truffles from That Recipe
- How to Make an Edible Valentine Gingerbread House from The Rebel Chick
- Peanut Butter Chocolate Parfaits from Stef’s Eats and Sweets
- Heart Shaped Chocolate Chip Cookies from Persnickety Plates
- Valentine Ladybug Oreos from Crayons & Cravings
- Round Up of Homemade Valentine’s Day Sweets and Treats from Blogghetti
- Mini skillet cookie from Caroline’s Cooking
- Easy Pink Cookie Recipe (Refined Sugar-free) from Savory Spin
- Truffle Honey Goat Cheese Stuffed Rolls from Taste Cook Sip
- Sweetheart Strawberry Brownies from For the Love of Food
- Heart Shaped Pancakes from TheGleasonCo
- Heart-Shaped Reese’s Stuffed Cookie for Two from The Spiffy Cookie
- Heart-Melting Chocolate Espresso Cookies from Faith, Hope, Love, & Luck Survive Despite a Whiskered Accomplice




Comments & Reviews
K P says
Spent about $30 on the ingredients and followed the recipe and instructions exactly. Set the timer – did a double batch (12 cookies), because I have a big oven. They were all black on the bottom and under done in the middle. What a waste of time and money.
Rebecca Hubbell says
Hey there, I’m sorry the recipe didn’t turn out for you. Do you make sure to bake on parchment and not silpat baking sheets, aluminum, or directly on the pan? These can make the bottoms burn. Also, these cookies are intended to be firm on the outside and gooey/underbaked on the inside – it states that in the post. So if you were trying to fully cook the center, then you would have burned the bottoms. I also don’t recommend baking that many cookies at once.