These Frankenstein Rice Krispie Treats are a chewy, sweet Halloween treat that kids will go crazy for! Takes just 30 minutes to prep!
Sink your teeth into another spooky treat such as these Mummy Halloween Cupcakes or a Halloween Spider Cookie!
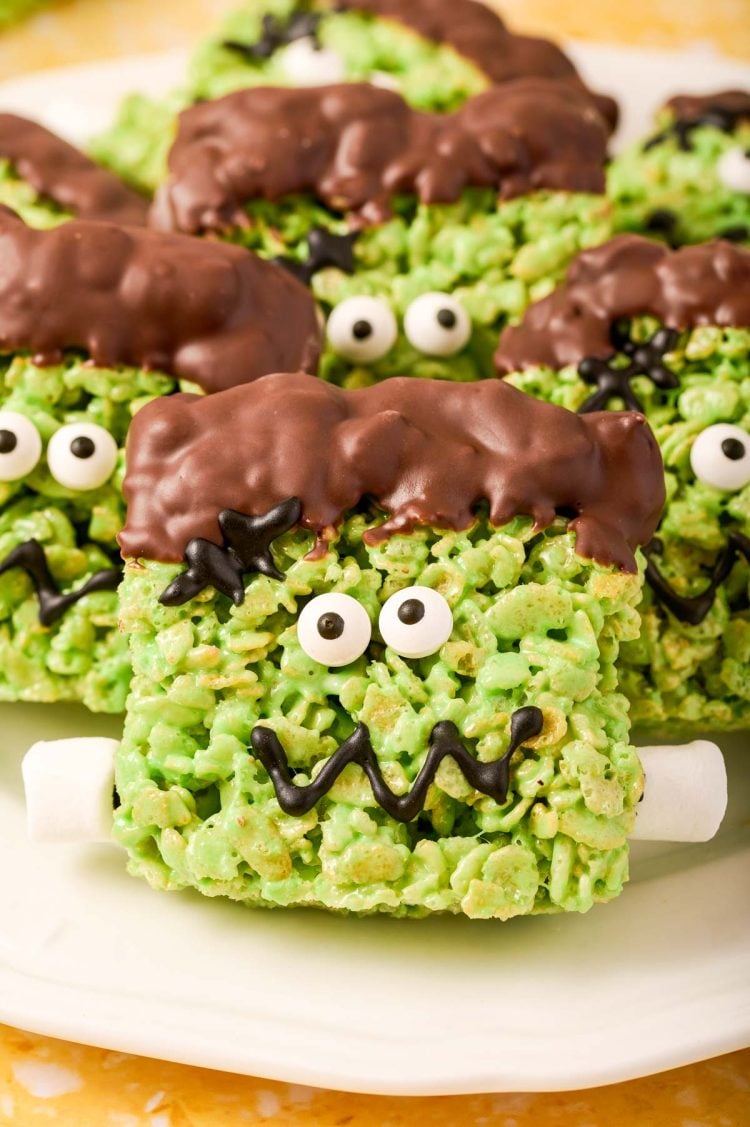
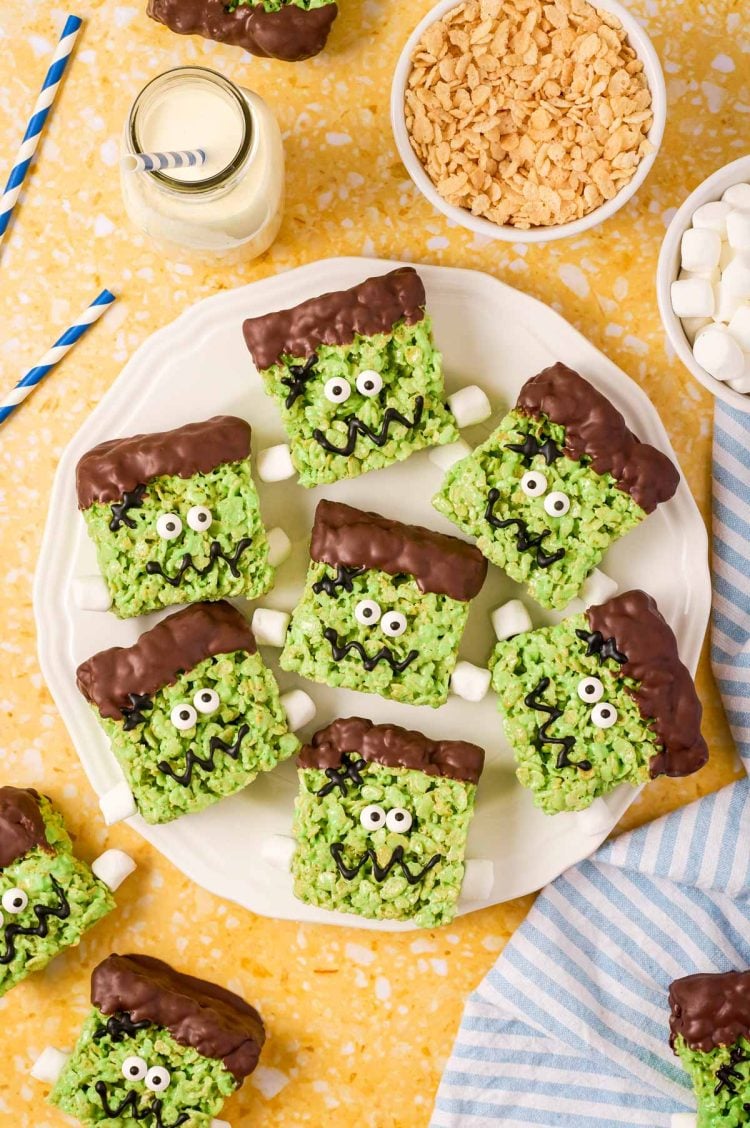
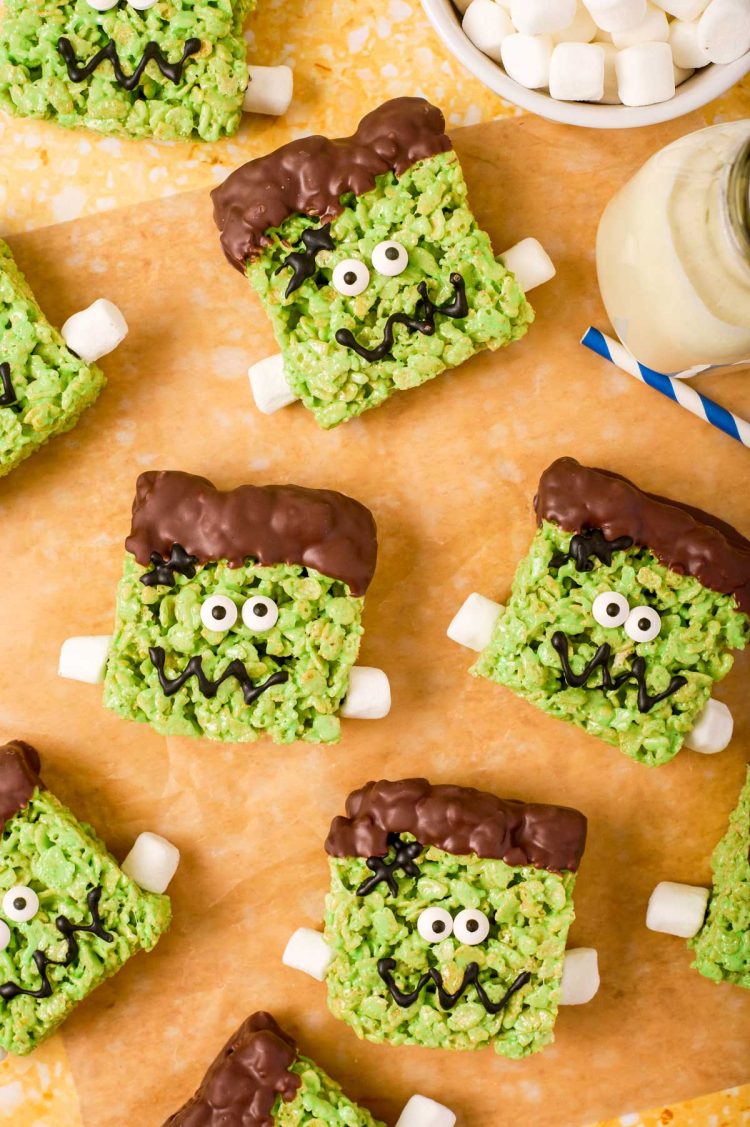
Take your Halloween Party to the next level with these Frankenstein Rice Krispie Treats! The classic homemade treats are dyed green and then dressed up with tasty decorations to resemble the popular Halloween monster!
Your kids and their friends will love all the detail you put into making these! Even if you aren’t having a party, these would be great wrapped in cellophane and tied off with a Halloween ribbon!
Then you can gift them to friends and family! You put in a small amount of effort whipping them up yet bring a ton of excitement to those receiving them!
Taking A Bite Into Frankenstein!
Taste: Sweet, marshmallow goodness coats the crunchy Rice Krispie cereal! The candy eyes, edible neck bolts, and melted chocolate hair bring more sweetness to every bite!
Texture: These homemade treats have all the texture you love in the store-bought version! They’re soft, chewy, crunchy, sticky, and airy! Just the way all Rice Krispie Treats should be!
These Frankenstein Rice Krispie Treats also have the added texture added from the melted chocolate and fun edible decorations!

Good-To-Know Tips For Making The Chewiest Cereal Treats
- Rubber spatulas work best for scraping the gooey marshmallow mixture off the sides of the mixing bowl.
- Slightly wet your hands with water or lightly coat them with cooking spray. This makes pressing them into the pan a lot easier since the mixture won’t stick to your hands!
- Don’t press the mixture into the pan too hard or the treats will be too compacted and turn out hard. For airy, fluffy treats simply press down gently.
- You can either cut the Frankenstein Rice Krispie Treats in the pan or turn them out onto parchment paper before cutting. I think cutting out of the pan is easier and results in more even and cleaner cuts.
- For dipping in the melted chocolate make sure the bowl is large enough to fit the Rice Krispie squares. Yet is still small enough that it has plenty of depth for dipping them in the melted chocolate.
Variations & Substitutions
There are a few ways to mix up these Halloween Frankenstein Rice Krispie Treats by using different ingredients or making larger batches.
- Cookie Icing – If you’d like, this can be swapped out for additional melted chocolate. Just use a piping bag to add the details to the treats! I just prefer the icing since it’s ready to go and made for detailed decoration!
- Frankenstein’s Neck Bolts – Feel free to get creative here! You can use Rolo’s, Reese’s cups, pretzel sticks, chocolate-covered raisins, small berries, or even nuts!
- Candy Eyes – There’s actually a big selection of candy eyeballs out there, so have fun and use your favorite!
- Thicker Treats – If you enjoy thicker Rice Krispie Treats you can make this recipe in an 8×8 baking pan.
- Make Them Bigger – Go ahead and cut the treats larger if you want bigger Frankenstein’s! Just keep in mind the recipe will then yield fewer treats.
- Double It – Go ahead and double the recipe for a 9×13-inch baking pan.
I love a good Halloween party with festive music playing, Witch’s Brew Punch being poured, and Halloween Dirt Cake being served!
Yet I also enjoy a quiet holiday at home while watching a Halloween movie! And of course, while sipping a spooky adult beverage like my Blood and Guts Cocktail!
Regardless of what I find myself doing, I also make sure my kids can munch on Halloween Seven Layer Magic Bars while coloring Free Halloween Printables! Effortless on my part, yet they have so much fun!
How To Store These Frankenstein Rice Krispie Treats
I found that these have the best taste and chewy texture the same day or the next day. However, you can store them in an airtight container at room temperature to enjoy them for 3 to 4 days.
Can I Use The Stove Instead Of The Microwave To Melt The Marshmallows?
How Do I Get The Best Green Color When Making These Frankenstein Rice Krispies?
Why Does This Recipe Call For Unsalted Butter And Salt?
How Long Should I Wait Before Cutting Into These Treats?
Let’s Connect!
If you’ve tried this recipe, please let me know how you liked it in the comments below and leave a review. I love hearing from you!
Don’t forget to tag me – @sugarandsoulco – on Instagram and Pinterest with your photos or join our Sugar & Soul Show-offs Community and share them there, where you can join our recipe challenges!


Frankenstein Rice Krispie Treats
Equipment
- Microwave-safe bowls
- Rubber Spatula
- 9X9-inch baking pan
- Wax or parchment paper
Ingredients
Treats
- 4 tablespoons unsalted butter
- 12 ounces mini marshmallows
- 1 teaspoon green food coloring
- 1 teaspoon vanilla extract
- ¼ teaspoon salt
- 5 cups Rice Krispies cereal
Decorations
- 1 cup chocolate melting wafers
- 18 candy eyes
- Black cookie icing
- 18 mini marshmallows
Instructions
Treats
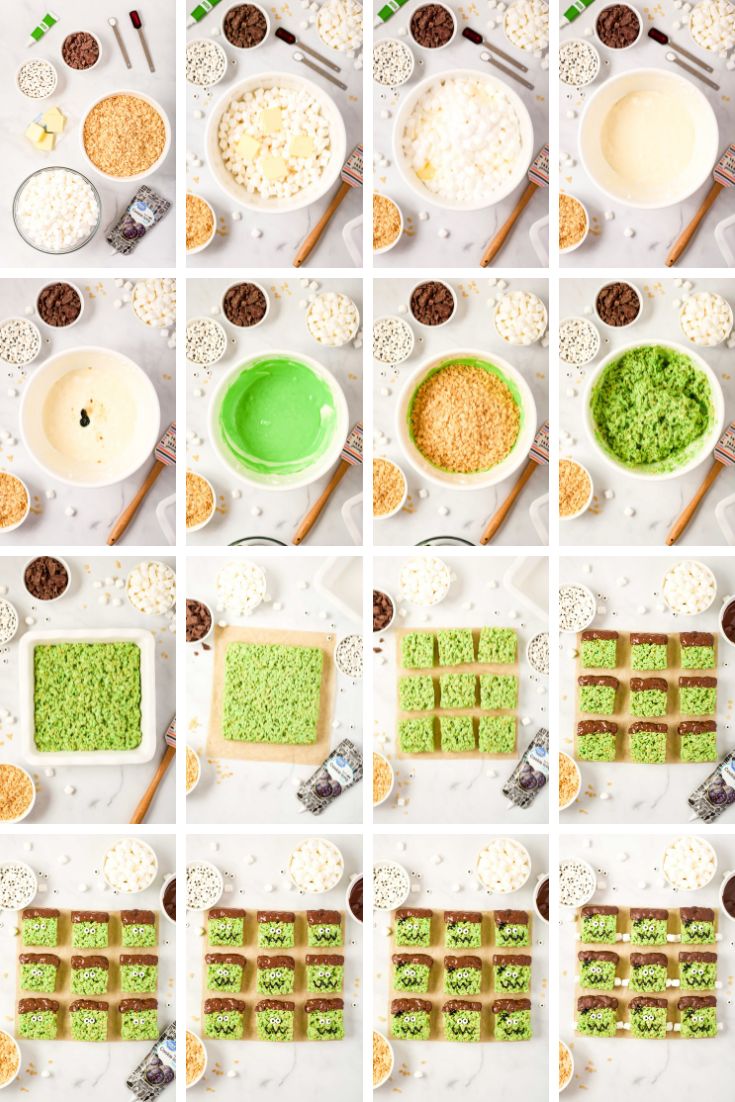
- Lightly spray a 9×9-inch baking pan generously with cooking spray or lined with greased parchment paper so it comes up the sides and set aside. Using parchment reduces the risk of the treats sticking in the pan if you don't spray it enough.
- Cut the butter into four tablespoons and add them to a microwave-safe mixing bowl with the mini marshmallows. Microwave for 90 seconds.4 tablespoons unsalted butter, 12 ounces mini marshmallows
- Stir until the marshmallow and butter mixture is smooth, then add the vanilla extract, food coloring, and salt. Stir until the mixture is evenly green in color.1 teaspoon green food coloring, 1 teaspoon vanilla extract, ¼ teaspoon salt
- Add the rice krispies cereal to the bowl and make sure to evenly coat the cereal with the marshmallow mixture.5 cups Rice Krispies cereal
- Use a greased rubber spatula to transfer the Rice Krispie mixture to the prepared baking pan. Gently press the Rice Krispies into the pan, making sure the top layer is as even as possible. I like to spray my hands with nonstick spray or use another piece of greased parchment paper to press the mixture.
- Let the Rice Krispies cool and firm up in the pan for 1 to 3 hours.
Assembly
- Once they’ve firmed up, flip them out onto a cutting board (or lift the parchment paper out) and cut the Rice Krispies into squares. Place a piece of parchment paper to the side to set the Rice Krispies on after dipping them in chocolate.
- Add the melting wafers to a small microwave-safe bowl and melt for 1 minute. Stir and microwave for an additional 30 seconds. Stir again until smooth. Microwave for an additional 15 seconds, only if needed.1 cup chocolate melting wafers
- Dip the top ½-¾ inch of each Rice Krispie square into the melted chocolate to create Frankenstein’s hair. When pulling the Rice Krispie out of the chocolate, let the chocolate drip off before placing it on the parchment paper. Let the chocolate-dipped Rice Krispies harden on the wax paper. You can also add chocolate sprinkles to the chocolate before it hardens to look more like hair.
- Dot the back of each eye with some black icing to secure the eyes in the center of the face.18 candy eyes, Black cookie icing
- Use the icing to draw the mouth and a line of stitches going diagonally across his forehead.Black cookie icing
- Then, place a dot of icing on one of the flat sides of a mini marshmallow to glue onto the side of his head to create the bolt going through his neck. Repeat on the other side.18 mini marshmallows
Notes
- Rubber spatulas work best for scraping the gooey marshmallow mixture off the sides of the mixing bowl.
- Slightly wet your hands with water or lightly coat them with cooking spray. This makes pressing them into the pan a lot easier since the mixture won’t stick to your hands!
- Don’t press the mixture into the pan too hard or the treats will be too compacted and turn out hard. For airy, fluffy treats simply press down gently.
- You can either cut the treats in the pan or turn them out onto parchment paper before cutting.
- For dipping in the melted chocolate make sure the bowl is large enough to fit the Rice Krispie squares. Yet is still small enough that it has plenty of depth for dipping them in the melted chocolate.
- How Do I Store These Frankenstein Treats? I found that these have the best taste and chewy texture the same day or the next day. However, you can store them in an airtight container at room temperature to enjoy them for 3 to 4 days.
- Can I Use The Stove Instead Of The Microwave To Melt The Marshmallows? Yes, you can! To do so, combine the butter and marshmallows in a large pot over medium heat. Stirring occasionally. Afterward, mix in the salt, vanilla extract, and green food coloring. Remove the pot from the heat and stir in the cereal. Once all the rice Krispies are coated, transfer the mixture to the baking pan.
- How Do I Get The Best Green Color When Making These Frankenstein Rice Krispies? Use green gel or liquid food coloring and then add it in until it has reached your desired color. I’ve found that gel food coloring works best! The treats in the pictures were made with 1 teaspoon of gel green food coloring.
- Why Does This Recipe Call For Unsalted Butter And Salt? This allows you to control how much salt is added to the recipe. However, if you’d like you can just use salted butter if you prefer. Just omit the salt if you do!
- Cookie Icing – If you’d like, this can be swapped out for additional melted chocolate. Just use a piping bag to add the details to the treats! I just prefer the icing since it’s ready to go and made for detailed decoration!
- Frankenstein’s Neck Bolts – Feel free to get creative here! You can use Rolo’s, Reese’s cups, pretzel sticks, chocolate-covered raisins, small berries, or even nuts!
- Candy Eyes – There’s actually a big selection of candy eyeballs out there, so have fun and use your favorite!
- Thicker Treats – If you enjoy thicker Rice Krispie Treats you can make this recipe in an 8×8 baking pan.
- Make Them Bigger – Go ahead and cut the treats larger if you want bigger Frankenstein’s! Just keep in mind the recipe will then yield fewer treats.
Nutrition
Did You Make This Recipe?
Don’t forget to share it with me on Instagram @sugarandsoulco and follow on Tiktok @sugarandsoulco and Pinterest @sugarandsoulco for more!



Share your thoughts!
Love this recipe? Share your thoughts with me below and leave a review! And don’t forget to connect on your favorite social platform below!