
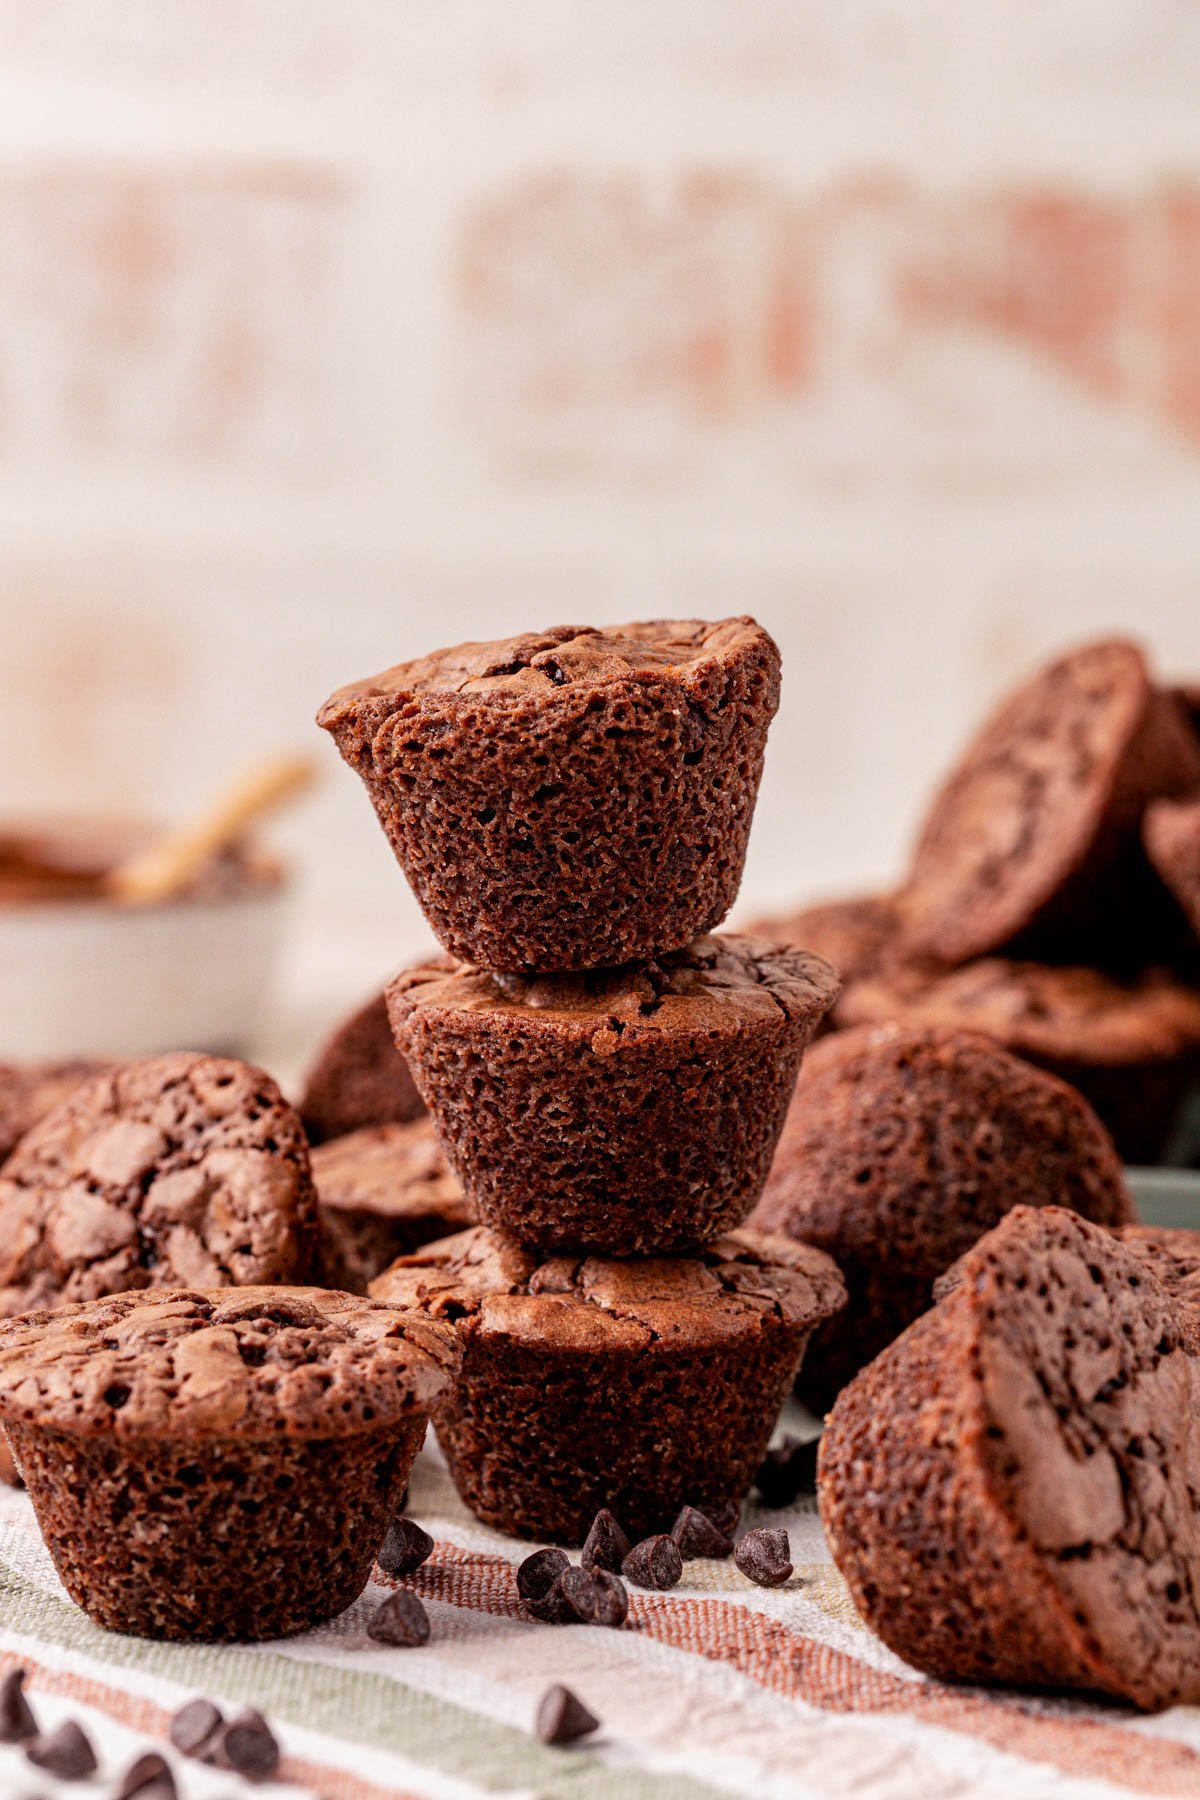
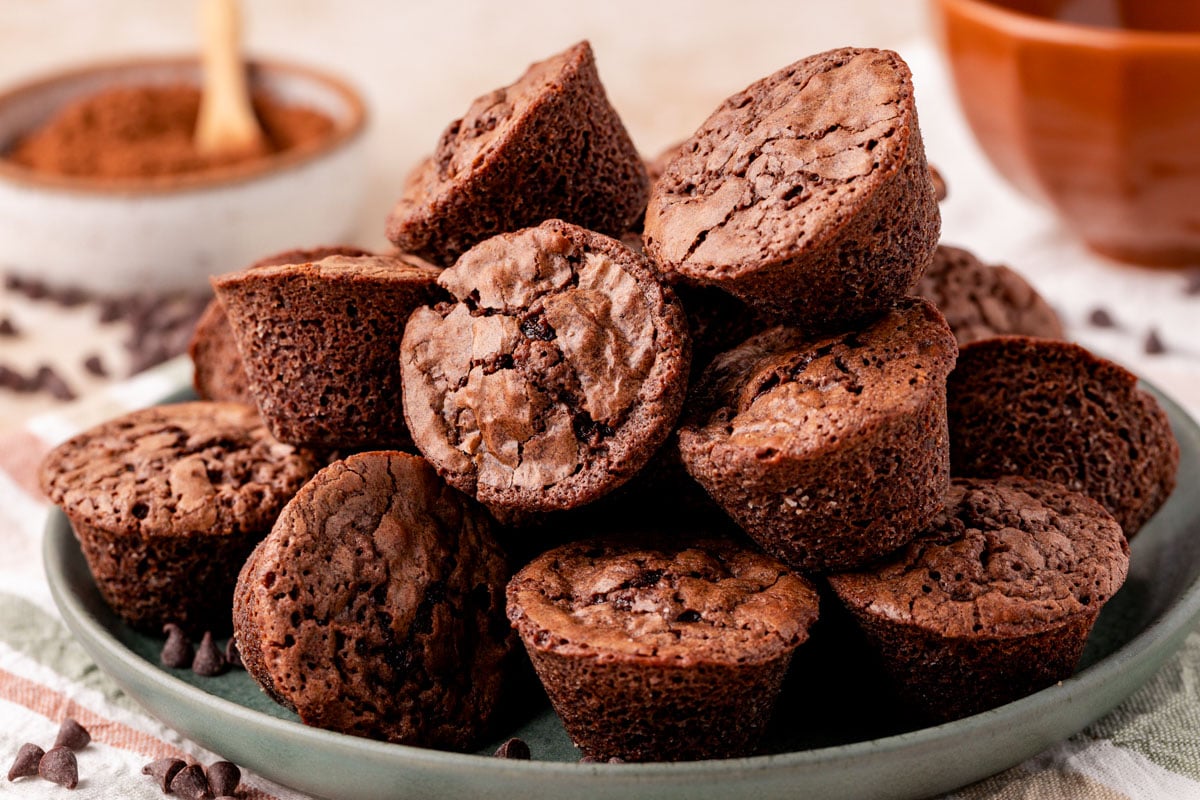
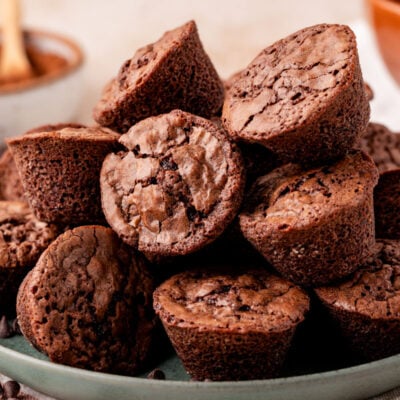
Homemade Brownie Bites
Indulge in a batch of these Homemade Brownie Bites with mouthwatering fudgy centers and perfect crinkly tops! Enjoy them as is for a mid-week treat, turn them into a decadent brownie sundae, or let the kids dress them up for the holidays with frosting and sprinkles!

Never Settle For Storebought Brownie Bites Again!
Storebought brownie bites may seem like a convenient choice, but they come with the sacrifice of flavor and texture! Therefore, they miss the mark by a mile when you’re looking to treat your sweet tooth!
Thanks to this simple Homemade Brownie Bites Recipe you no longer have to sacrifice anything! Instead, each little bite treats you to rich, chocolaty goodness with fudgy centers that will keep you coming back for more!
To make these bites better than storebought we kept the ingredients simple but used an easy technique to incorporate the ingredients without adding extra air and then bloomed the cocoa powder. The results are fudgy brownies with an unforgettable chocolate flavor that will have you skipping a container of the store-bought version every time.
Rebecca’s Recipe Review
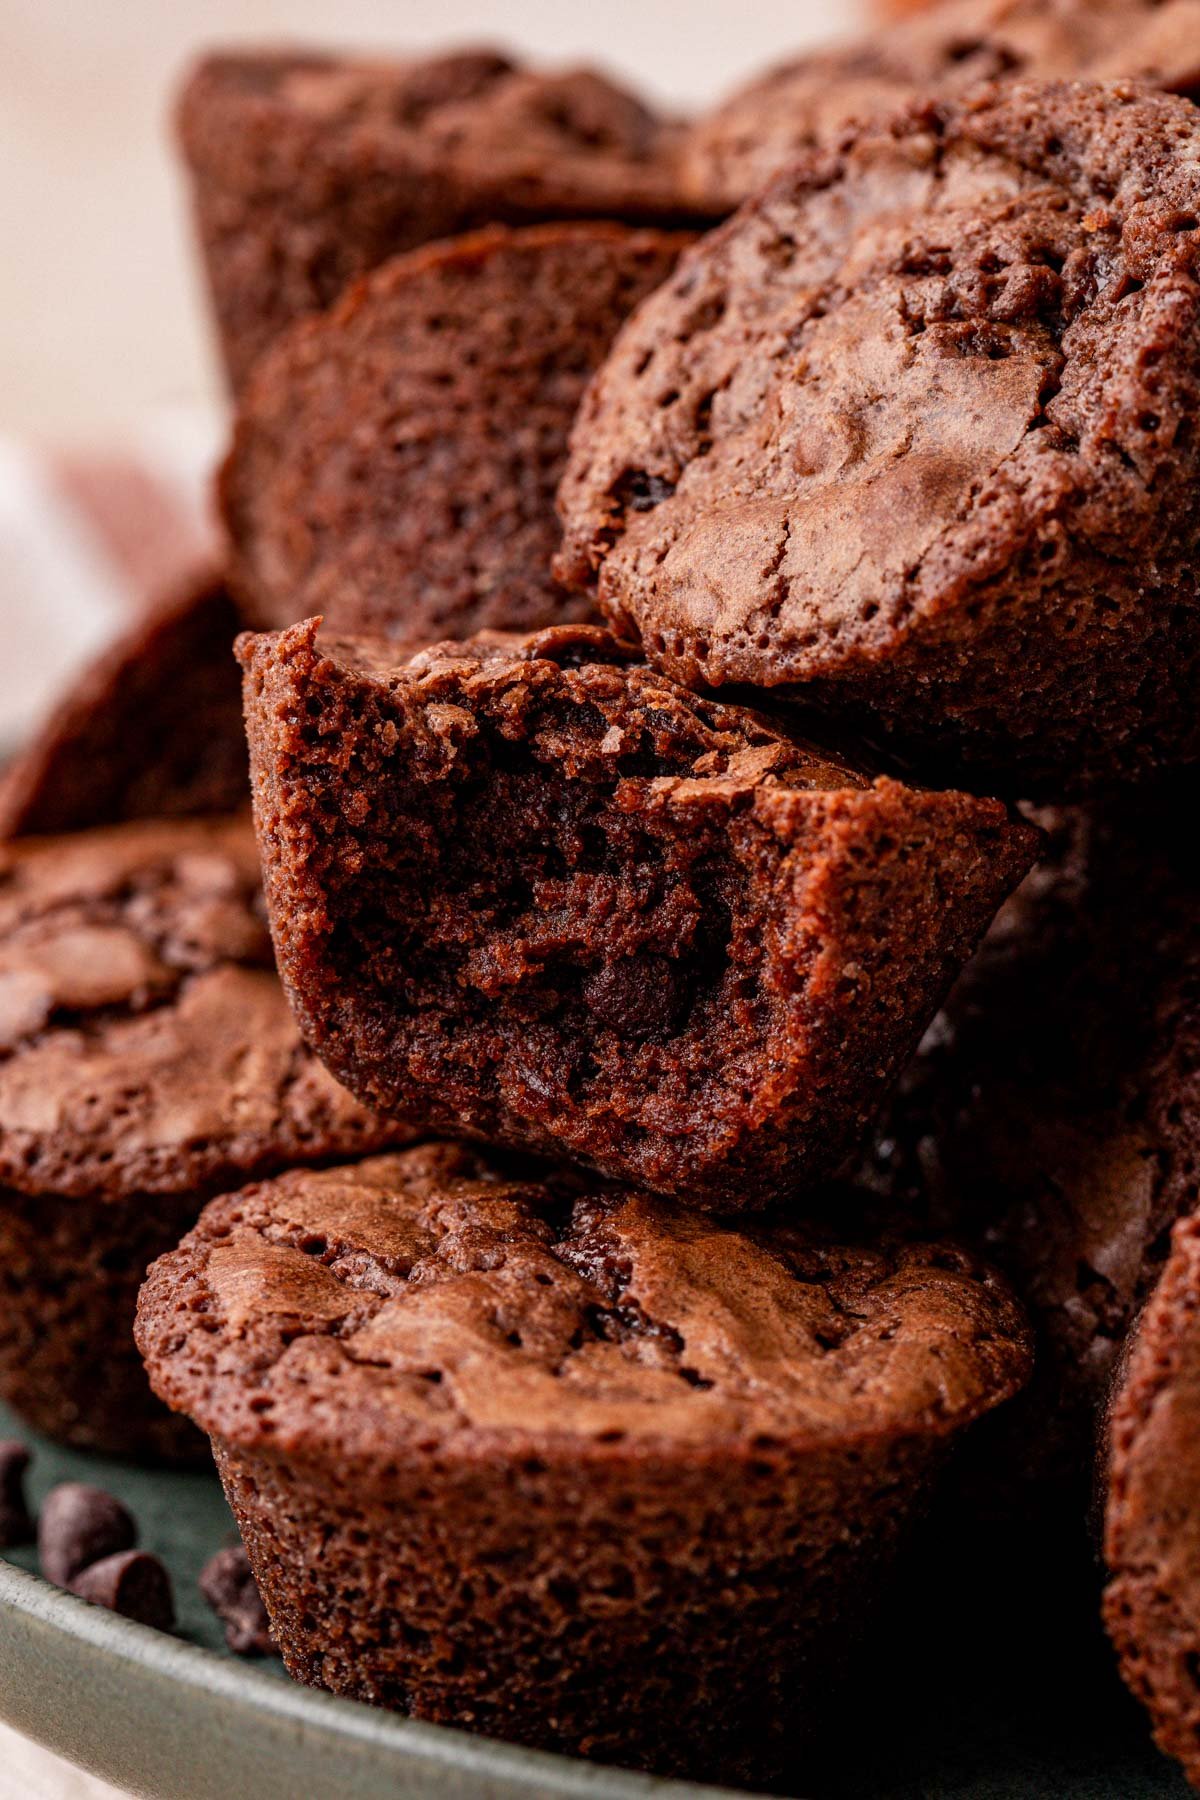
Taste: Super rich and chocolaty!
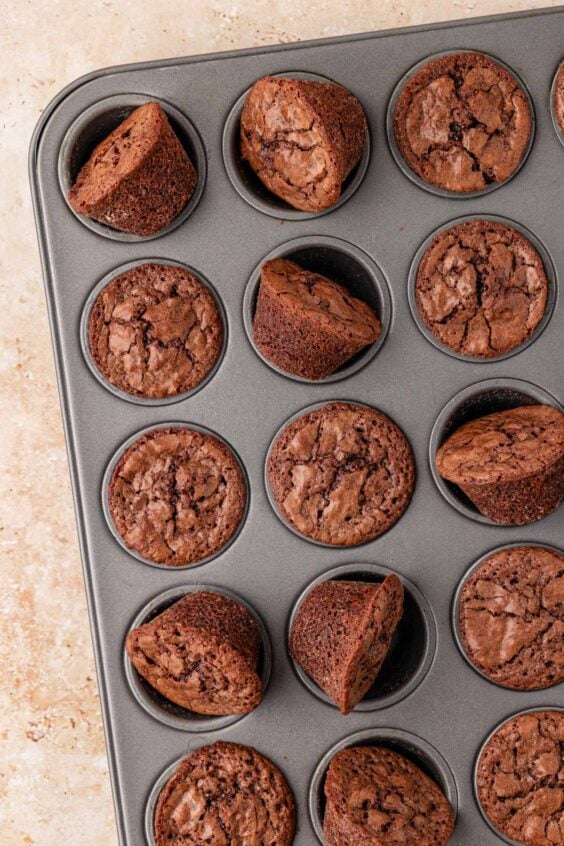
Texture: Fudgy center with a crinkle top and slightly crusted edges. Every bite is like the edge of the brownie.
Ease: 5/10 – not hard per se, but maybe a little more involved than a typical pan of brownies.
Pros: Easy little individual servings.
Cons: Cleaning the mini muffin pan.
Would I Make This Again? Yes, we make these a lot for events when we need lots of kids’ desserts, but the adults enjoy them, too!
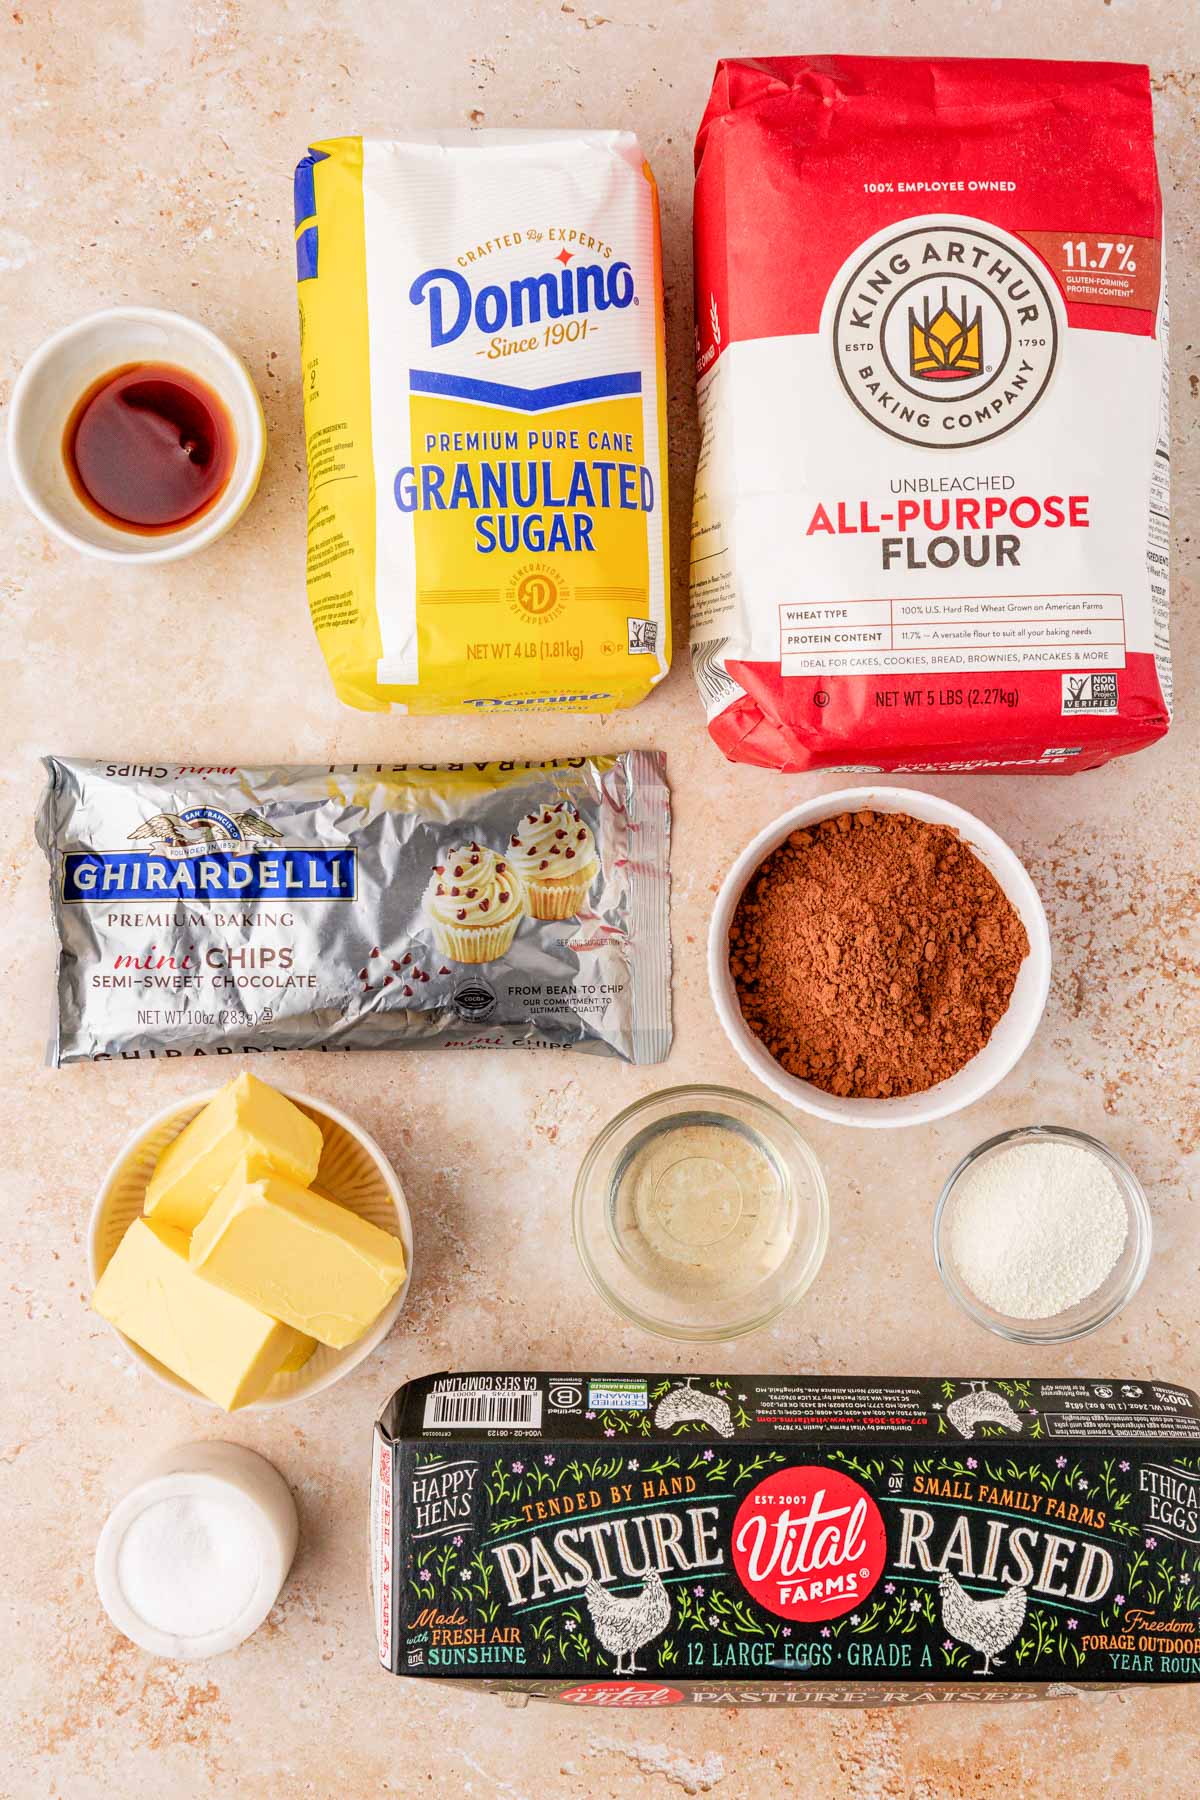
Mini Brownie Bites Ingredients
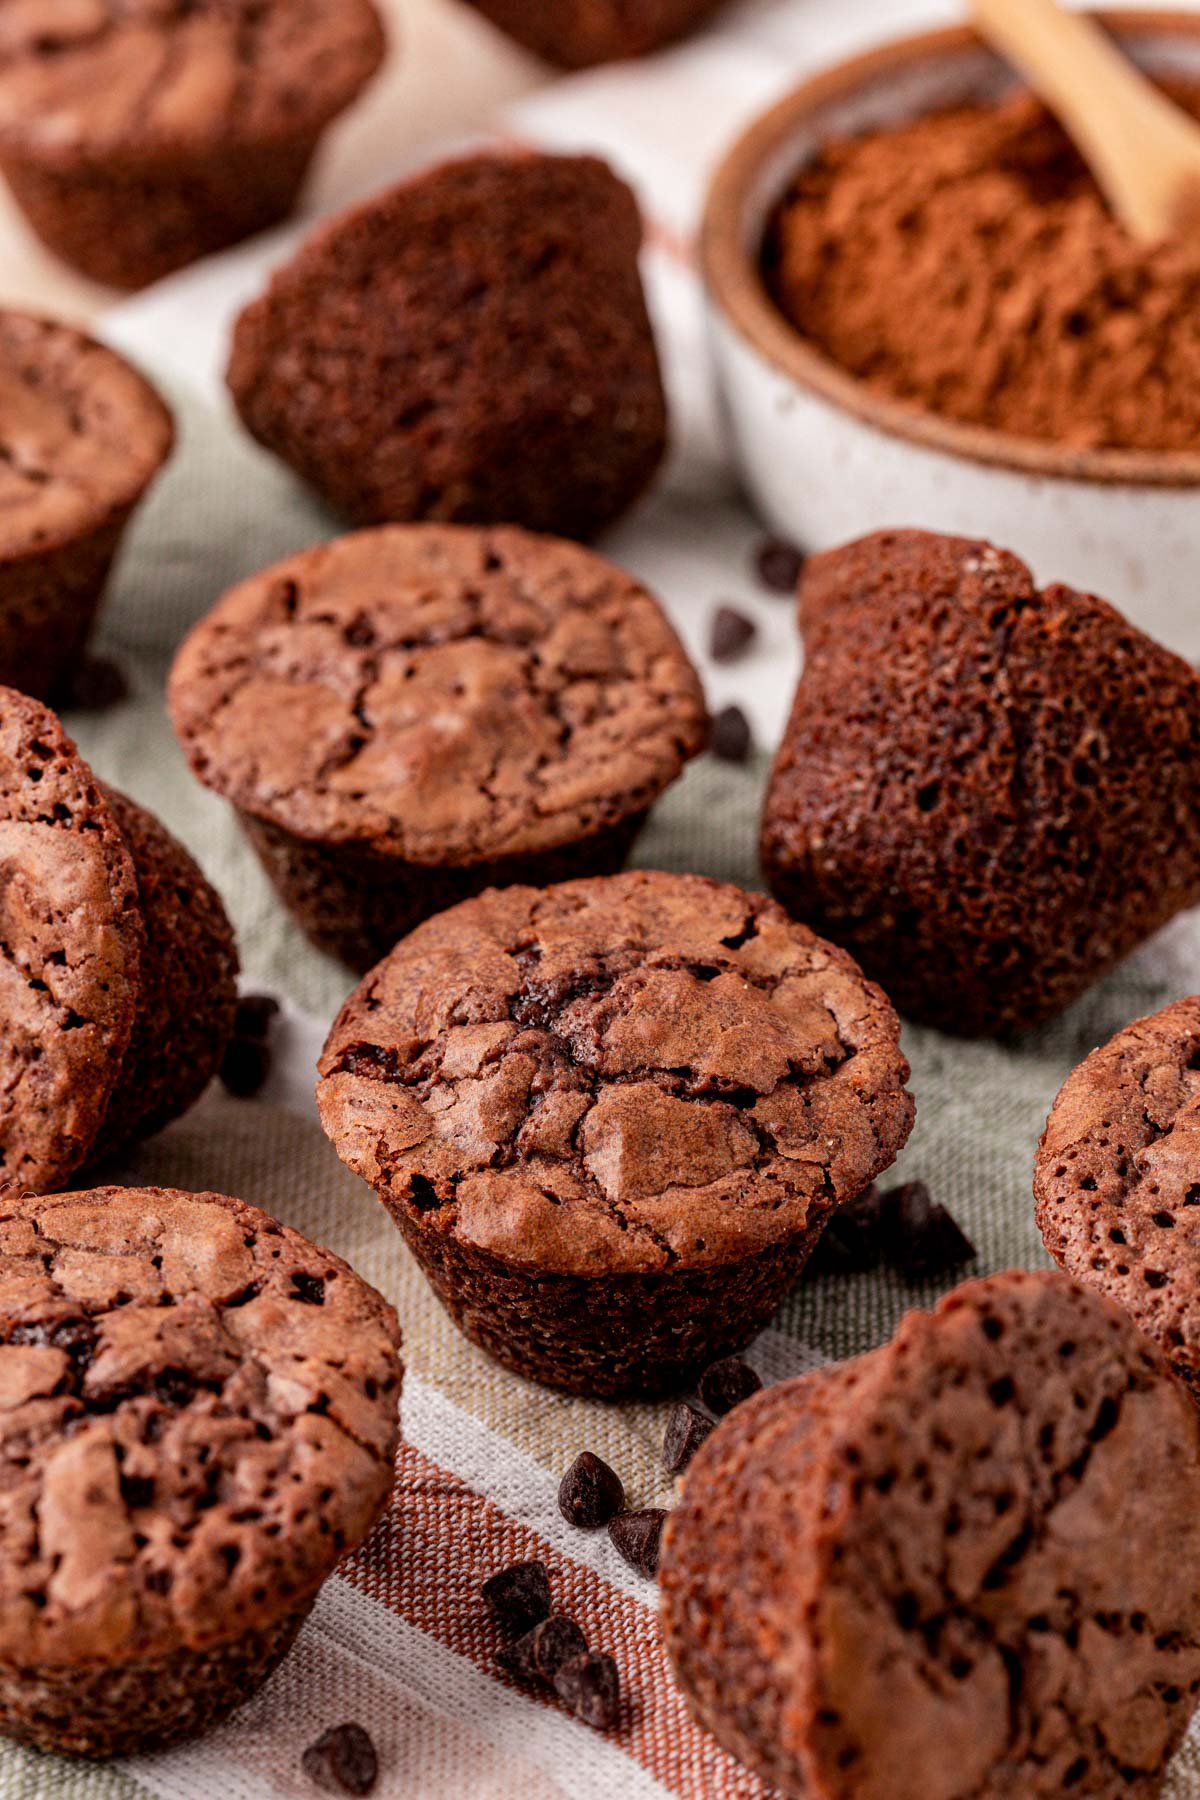
Though this brownie recipe is made from scratch the majority of the ingredients are pantry staples, keeping it homemade yet convenient to make! For pantry staples, you’ll need all-purpose flour, granulated sugar, canola oil, vanilla extract, salt, and unsweetened cocoa powder.
Feel free to use whatever unsweetened cocoa powder that you have on hand! However, keep in mind that you can also play with the flavor of the brownies based on the cocoa powder that you use.
Unsweetened cocoa powder will deliver brownies that are lighter in color and have a more concentrated chocolate flavor. Whereas Dutch-process cocoa powder creates brownies with a more intense, rich chocolaty flavor.
Lastly, if you opt to use black cocoa powder you can expect the brownies to have a smooth taste with a deep flavor that’s similar to Oreo Cookies. Again, feel free to use what you have on hand or to branch out with other cocoa powders!
To wrap up the brownie ingredients, you’ll also need high-quality unsalted butter, large eggs, malted milk powder, and mini-semi sweet chocolate chips.
How To Make Brownie Bites From Scratch
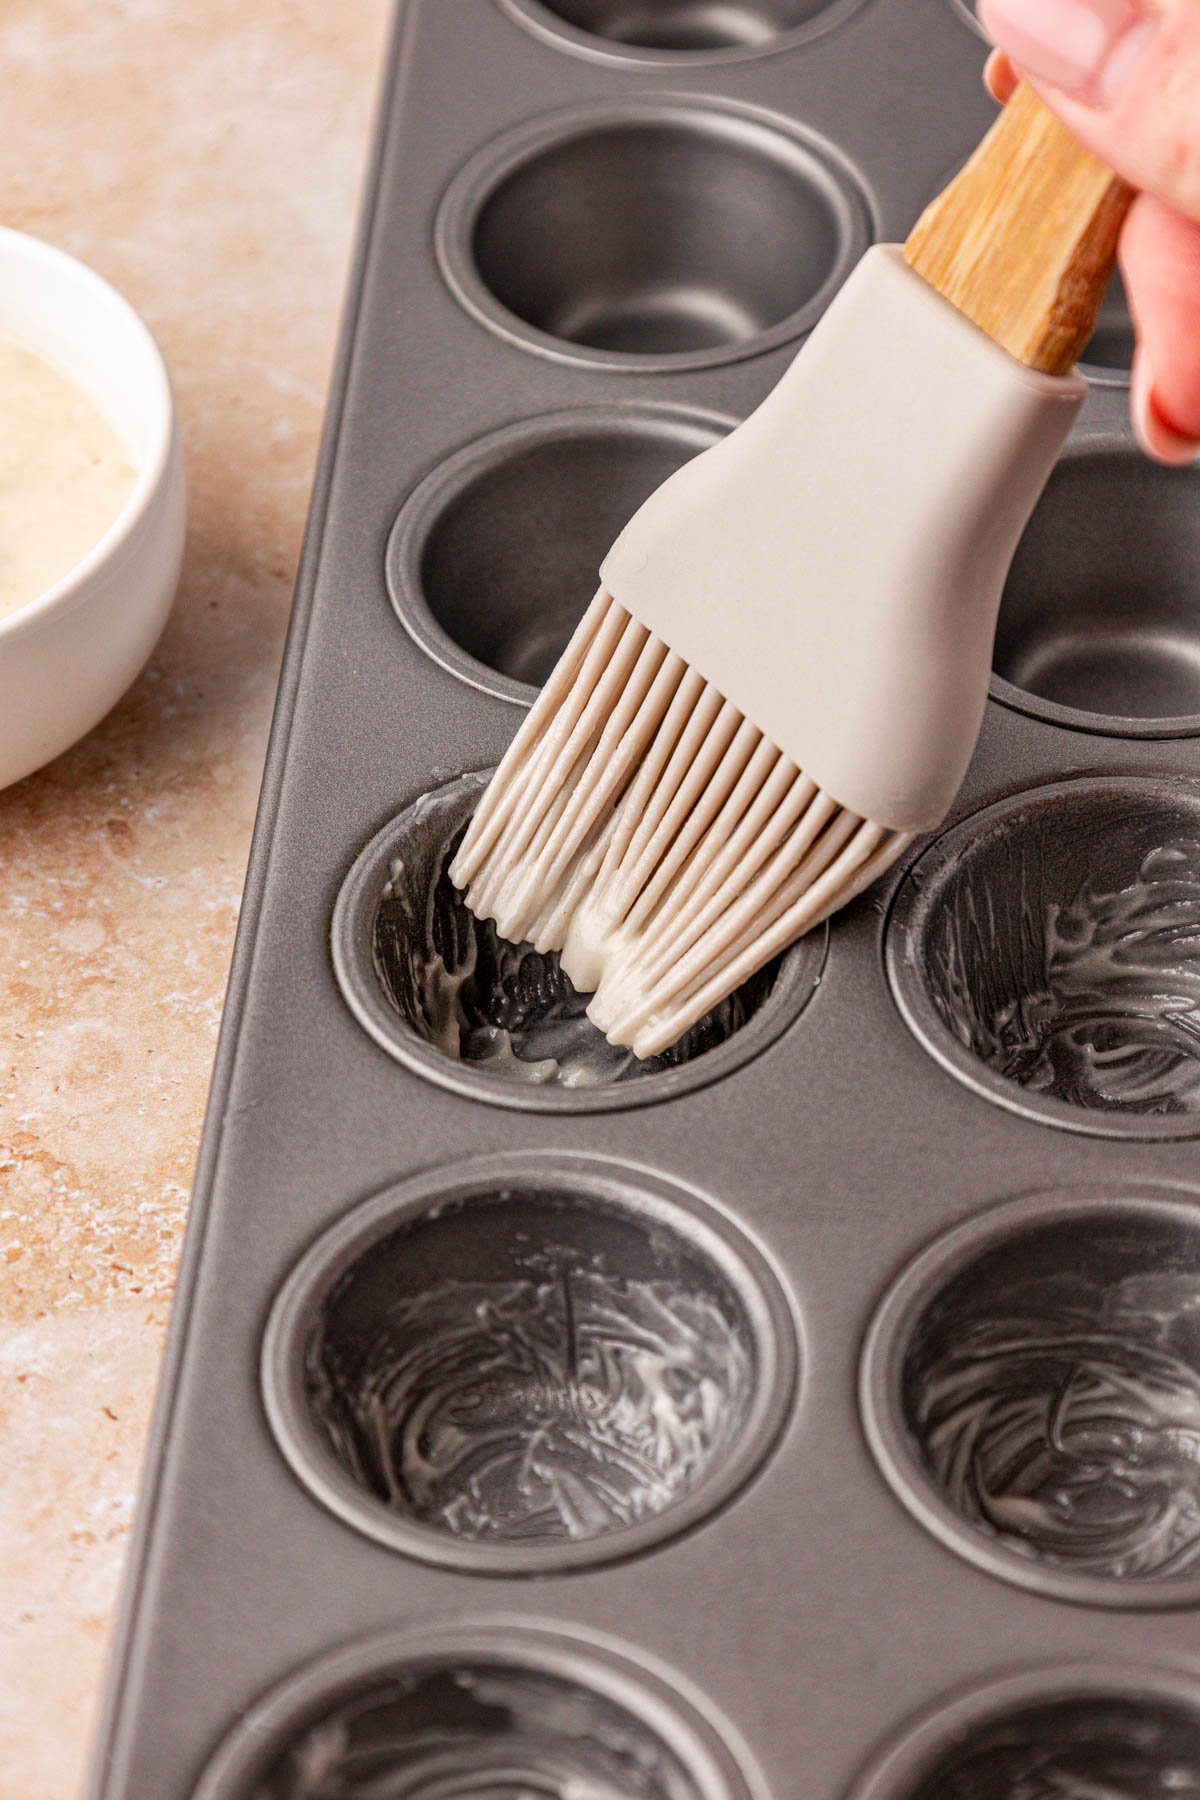
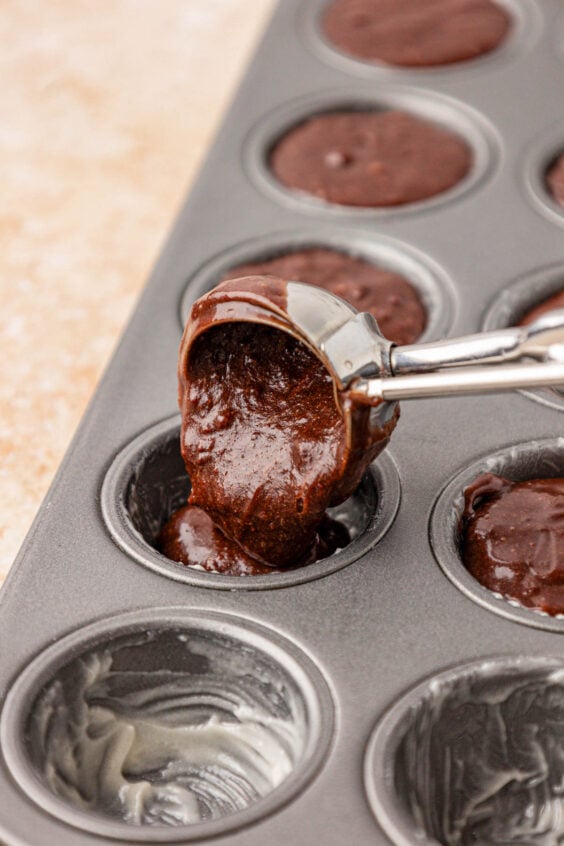
- Preheat the oven and use Cake Goop (Magic Pan Release) to grease the wells of a mini muffin pan.
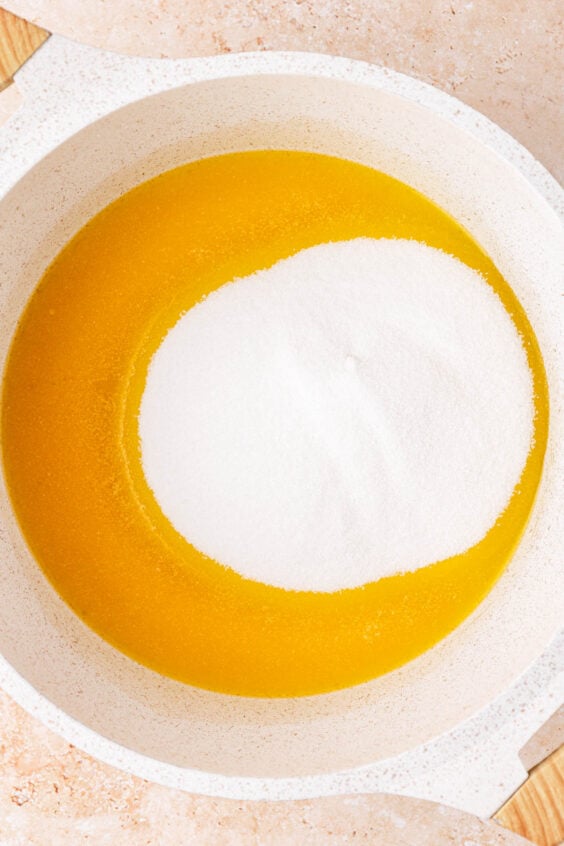
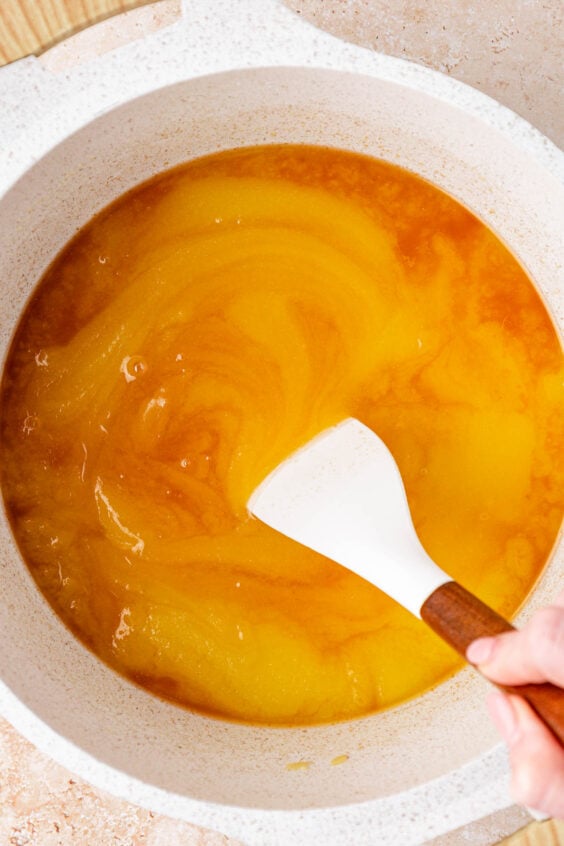
- Melt unsalted butter over low heat and then stir in granulated sugar until the mixture becomes smooth and has started to emulsify. Afterward, remove the mixture from the heat to allow it to cool.
- Beat canola oil and vanilla extract into the melted butter mixture until fully combined with no separation between the ingredients.
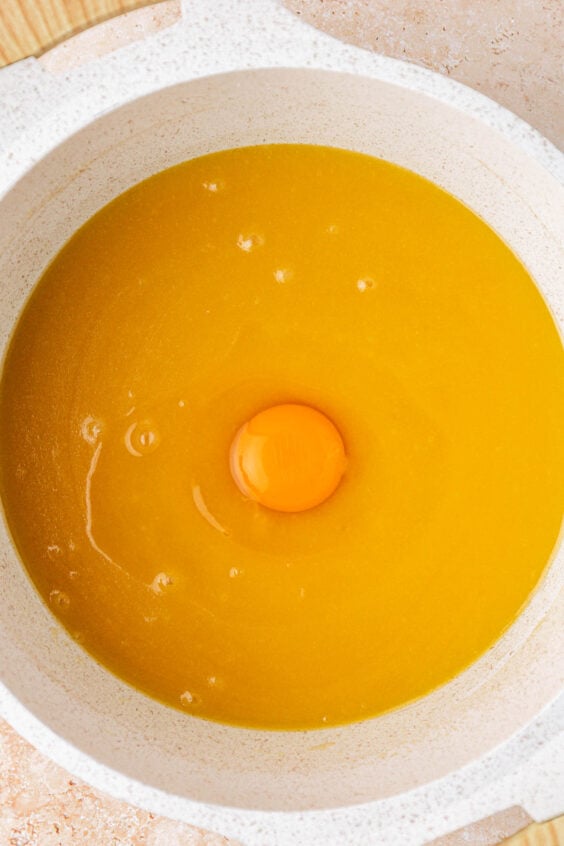
- Beat in the large eggs one at a time, mixing with a fork or spatula after each addition.
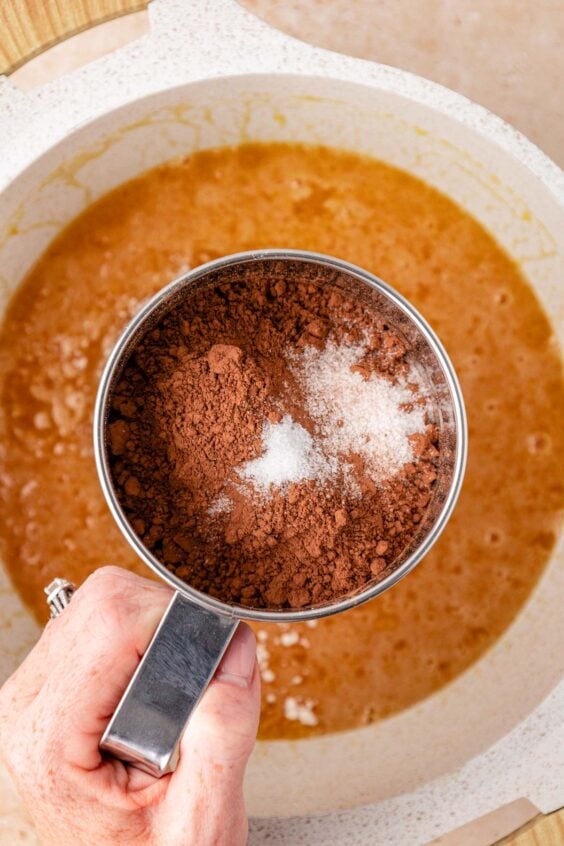
- Sift the all-purpose flour, unsweetened cocoa powder, malted milk powder, and salt into the melted butter and sugar mixture. Then gently stir the batter together using a rubber spatula until almost all of the dry streaks are gone.
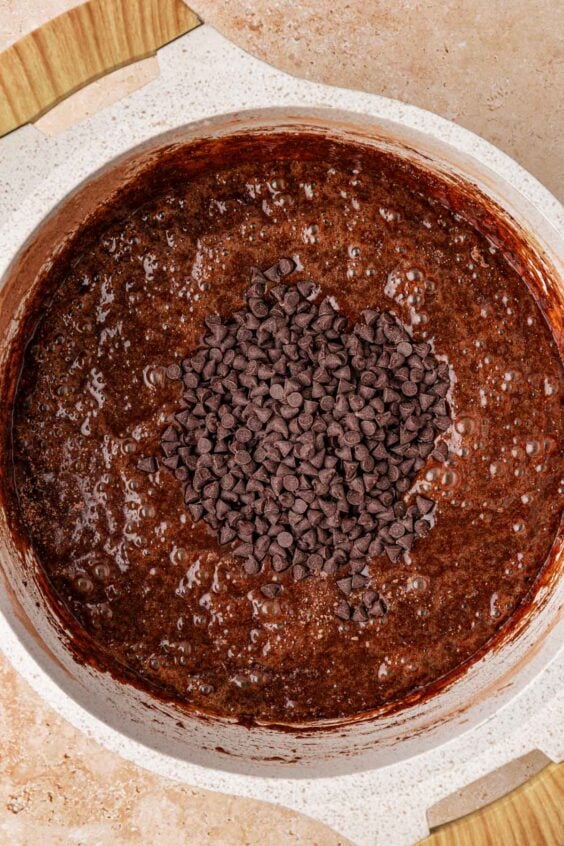
- Fold in the mini semi-sweet chocolate chips.
- Pour the brownie batter into the wells of the greased mini muffin pan and then bake them in the preheated oven.
- Cool the homemade brownie bites in the pan before removing them.

- Greasing The Pan – We tested this recipe 5 times using different methods of greasing the pan. Ultimately, we found that using Cake Goop (Magic Pan Release) pops the brownies right out of the tin without any issues.
- Brownie Bite Size – If you prefer, you can swap out a mini muffin pan for a regular-size muffin tin. However, you’ll need to adjust the baking time to accommodate their larger size.
- Pan Of Brownies – This recipe can also be used to make an 8×8, 9×9, or even a 9×13 pan of brownies without any adjustments to the recipe except for baking time.
- Mix-Ins – Feel free to swap the mini-chocolate chips out for peanut butter chips, peppermint chips, or even finely chopped walnuts or pecans.
- Melted Butter – Though it is an added step, melting the butter for these brownies is important to their final texture! Instead of creaming the butter and sugar together, we melt the two together on the stovetop to eliminate adding any extra air to the brownie batter. This gives us perfectly dense, chewy brownies!
- Blooming Cocoa Powder – Using the warmth of the melted butter and sugar mixture also helps the cocoa powder to bloom, producing brownies with a mouthwatering flavor! Therefore, it’s important to texture and taste not to skip out on melting the butter!
How To Serve Brownie Bites
- As is! – These brownie bites are incredibly delicious as is for a nice little single-serve treat! A great option for an easy potluck contribution.
- With Frosting! – For an extra sweet treat finish the brownie bites off with frosting! Try using my Fluffy Peanut Butter Frosting for a salty-sweet spin or Nutella Frosting for a touch of hazelnut flavoring!
- Brownie Sundaes – Who can pass up a towering brownie sundae?! Use these brownie bites for the base and then pile on all of your favorite ice cream sundae toppings!
- Kids Edible Entertainment! – You can easily turn these into holiday brownie bites by topping them with American Buttercream Frosting or Chocolate Buttercream Frosting and then adding fun seasonal sprinkles! An easy hands-on edible activity that kids can decorate for Halloween, Christmas, and Valentine’s Day!
- Holiday Brownie Bites! – Use this Homemade Brownie Bites recipe to turn them into seasonal treats such as my Christmas Tree Brownie Bites or Hot Chocolate Brownie Bites.
How To Store Mini Brownies
Store Mini Brownies in an airtight container with parchment paper separating the layers to prevent them from sticking together. The homemade brownies can then be kept at room temperature to enjoy for up to 3 to 4 days.
How To Freeze Brownies
To freeze homemade brownie bites first allow them to cool. Afterward, place the bites onto a baking sheet and flash-freeze them for one hour. Next, transfer the frozen brownie bites into a freezer-safe airtight container or gallon Ziploc freezer bag.
Flash-freezing the brownie bites before storing them will prevent the brownies from sticking together when stored in a bag or airtight container.
Alternatively, instead of flash freezing, you can individually wrap each brownie bite in plastic wrap and then again in aluminum foil. For an easier storage option can simply place the bites into an airtight container with parchment paper separating the layers.
Store the Brownie Bites in the freezer for up to 3 months. When you’re ready to enjoy them, simply thaw them at room temperature first!
More Brownie Recipes
- Gourmet Pecan Pie Brownies – Pecan filling combines with homemade brownies for a decadent treat!
- S’mores Brownies – Complete with a graham cracker crust and a toasted marshmallow top!
- Peanut Butter Crunch Brownies – The ultimate brownie that’s sweet yet salty and chewy yet crunchy!
- Cosmic Brownies – The delicious homemade version of the iconic childhood lunchbox treat!
- Brownies with Cream Cheese – Indulge in this no-fuss recipe that’s swirled with tangy cheesecake filling!
Did You Make This Recipe?
If you’ve tried this recipe, please let leave a review in the comments below. I love hearing from you! Don’t forget to tag me – @sugarandsoulco – on Instagram and Pinterest with your photos, or join our Sugar & Soul Show-offs Community and share them there.
Brownie Bites Recipe
Ingredients
- 1 cup unsalted butter 227g, I use Kerrygold
- 2½ cups granulated sugar 500g, I use Domino
- 2 tablespoons canola oil
- 1 tablespoon vanilla extract
- 5 large eggs I use Vital Farms
- 1 cup all-purpose flour 130g, I use King Arthur
- ¾ cup + 1 tablespoon unsweetened cocoa powder 80g, I use Ghirardelli
- 2 tablespoons malted milk powder 20g, optional
- ¾ teaspoon salt
- ½ cup mini semi-sweet chocolate chips or 4oz. chopped baking chocolate
Instructions
- Preheat the oven to 350°F. Grease a mini muffin pan with cake goop by brushing it in the wells of the pan (see notes) and set aside.

- Melt 1 cup unsalted butter in a heavy-bottomed saucepan over low heat. Add 2½ cups granulated sugar and stir until smooth, the butter and sugar have started emulsifying, and no butter is separated from the sugar. Remove from heat and let the mixture cool for 5 minutes, stirring often to release heat.
- Add 2 tablespoons canola oil and 1 tablespoon vanilla extract to the butter and sugar and beat them in with a rubber spatula until fully combined and there's no separation between the ingredients (no oil resting on top).
- Beat in 5 large eggs one at a time, beating with the spatula or a fork after each one. Mix until fully incorporated.
- Sift the 1 cup all-purpose flour, ¾ cup + 1 tablespoon unsweetened cocoa powder, 2 tablespoons malted milk powder, and ¾ teaspoon salt into the butter and sugar mixture, stirring gently with a rubber spatula just until almost all the dry streaks are gone.
- Fold in the ½ cup mini semi-sweet chocolate chips.
- Divide the brownie batter evenly into the wells of the prepared baking pan (about 1½ tablespoons each) and bake for 14 to 16 minutes.
- Cool before removing them from the pan. Use a paring knife to help pop them out.

Notes
- We tested this recipe 5 times using different methods of greasing the pan.
- Regular butter did not let the bites release and crisped up the edges more than I liked.
- Baking cooking spray made the batter that touched it bake up weirdly and sort of souffle out of the pan.
- Regular nonstick spray did not release as easily as you’d think and had to be pried out with a knife.
- No coating also stuck to the non-stick pan.
- Mini muffin liners work, but some of the brownie will stick to the liners when pulled away from them.
- Cake goop, though an extra step to prepare, ensures that the brownies pop right out of the pan without issue.
Nutrition
Did You Make This Recipe?
Don’t forget to share it with me on Instagram @sugarandsoulco and follow on Tiktok @sugarandsoulco and Pinterest @sugarandsoulco for more!


I’ve been making these for the last couple of years. This way if someone is on a diet they can still have 1 brownie bite