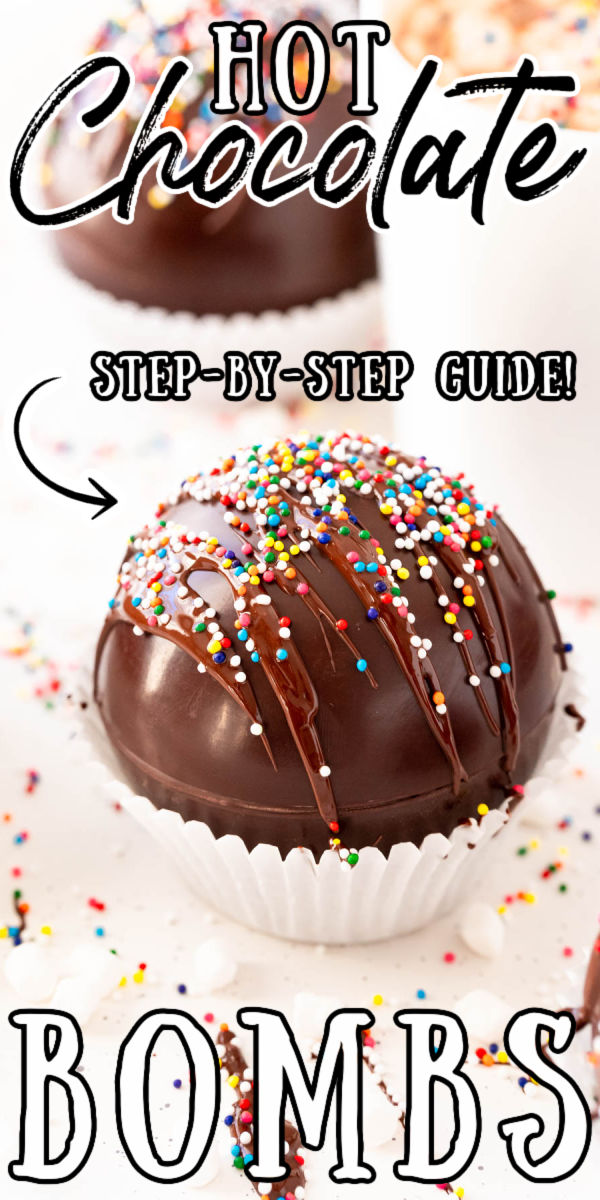
Hot Chocolate Bombs have taken the world by storm and this is the ultimate step-by-step guide for how to make them with tons of tips and tricks from days in the kitchen making them! Plus these fun sweet treats make great gifts!
Once made, simply add steaming hot milk and top with additional marshmallows or whipped cream!
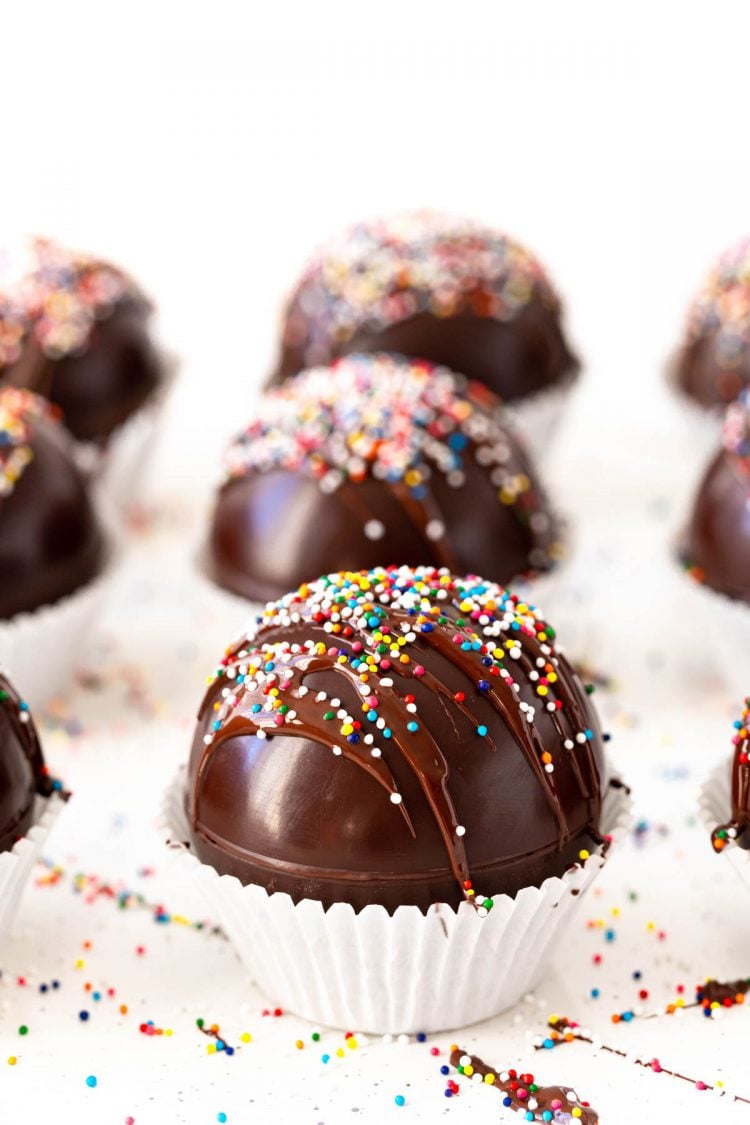
Everyone’s obsessed with these Hot Chocolate Bombs and if you want to try your hand at making the viral TikTok sensation, I’ll walk you through the process! I’ve got tons of photos and recipe notes that will help you and you’ll be enjoying a hot mug of cocoa in no time!
Making these Hot Cocoa Bombs isn’t hard but it is a little technical and time-consuming. So if you really just want hot chocolate, I suggest skipping all the hoopla and just making yourself a cup. But if you want to experience the fun trend that is Hot Chocolate Bombs, let’s get started!
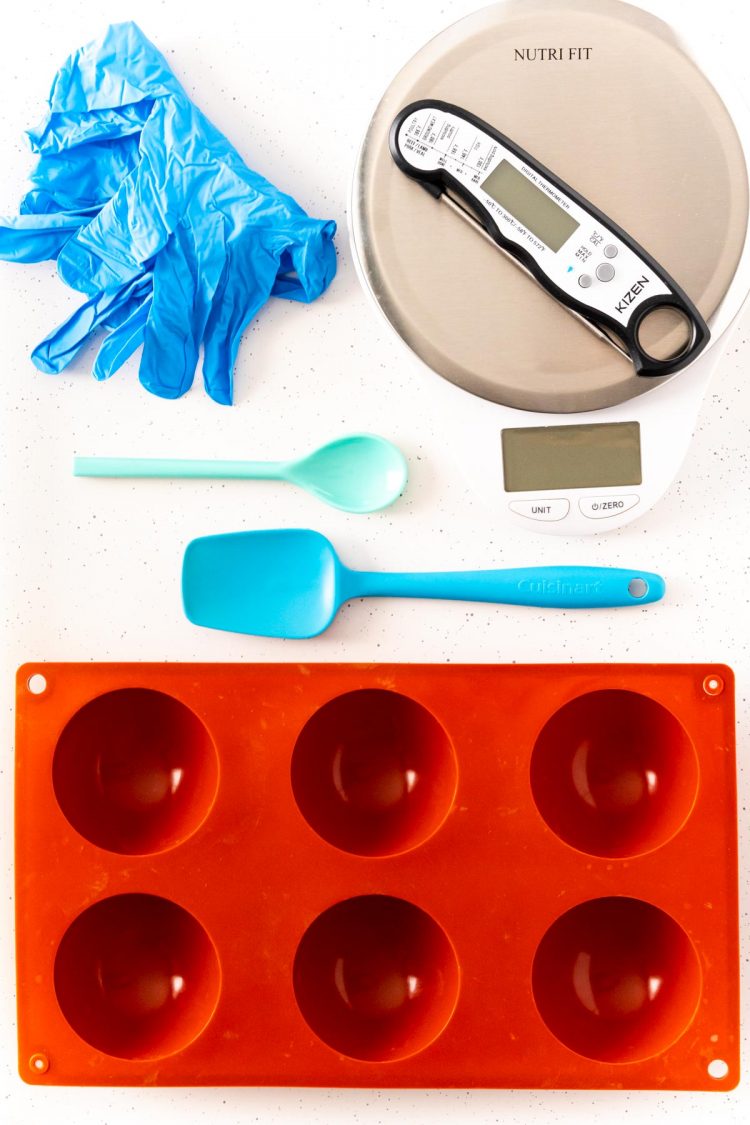
Tools For Making Hot Chocolate Bombs
Unfortunately, you’ll need to plan ahead when making these confections because there are a few tools you’ll need that you likely don’t have on hand already. So here’s a list of everything you’ll need to successfully prepared your Hot Chocolate Bombs!
- Silicone Mold: In order to make the spheres you’ll need a special mold. I used the largest mold from this set, it measures about 2 3/4-inches in diameter.
- Instant Read Kitchen Thermometer: This is necessary for tempering the chocolate, this is the one I use and is a great kitchen tool to have! If you’re using melting wafers or melts (which I don’t recommend flavor-wise) you don’t need this.
- Nitrile Food Prep Gloves: If you want perfectly shiny and unblemished hot chocolate bombs, you’ll want to invest in a box of these gloves! You can use other brands, but make sure you use similar food safe ones and not the bulky clear plastic ones.
- Food scale: If you’re using couverture chocolate morsels or chocolate chips, you’ll want a kitchen scale to properly measure the amounts. If you are using chocolate bars, you shouldn’t need this.
- Spoon or Food Paintbrush: I tested this recipe using both and much preferred the spoon. The paintbrush gives you more control but I felt the layers were really thin and required a third layer and more prep time. A smaller rounded spoon was easy to work with and something most people already have. A silicone brush does not work well for this recipe as it can leave large streaks/areas of exposure.
- Rubber Spatula: I like using a smaller one since the chocolate is melted in a small bowl. You want a silicone spatula so that you make sure you can scrape the bowl really well.
- Small/Medium Bowl: You don’t need a huge bowl, about the size of a cereal bowl is good, just make sure it’s microwave safe. Glass is the best option.
- Small Baking Sheet: This is an optional tool but one that I really appreciated having. An 8×13-inch baking sheet was the perfect size to place the mold on while prepping and chilling and made them really easy to transfer.
- Cupcake Liners: You don’t have to use these but they work well to hold the bombs in and are great for packaging them up in cupcake boxes or cello bags for gifts.
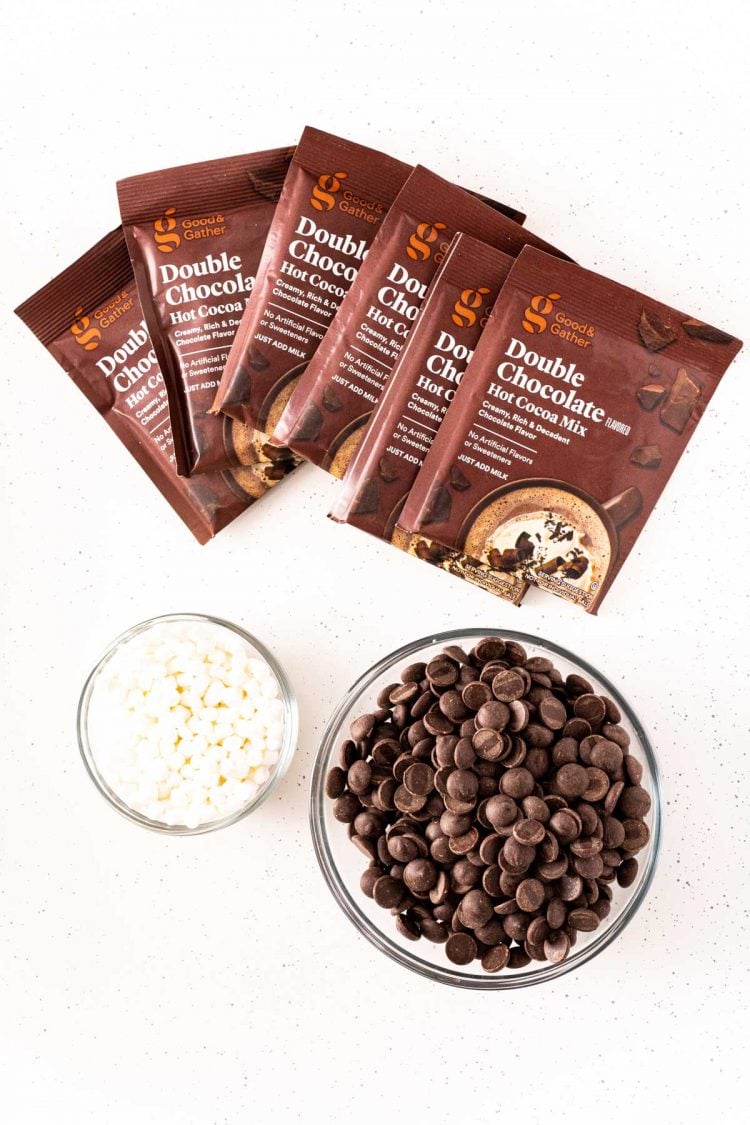
Ingredients For Hot Chocolate Bombs
- Chocolate: I tested this recipe with several different kinds and personally think only couverture chocolate morsels (I used Callebaut) or finely chopped high-quality chocolate such as Ghirardelli baking chocolate should be used to make these. You want to use a chocolate that’s between 55% and 80% cocoa for this recipe and it needs to have cocoa butter as one of the first ingredients, this will give the best flavor overall.
- Hot Chocolate Mix: Choose your favorite premade packaged mix between .85 and 1.25 ounces or use 2 to 3 tablespoons of a homemade mix!
- Mini Marshmallows: You can use classic mini marshmallows, dehydrated marshmallows, or a mix of both!
- Milk: You can’t make hot chocolate without it! This is just for serving, you don’t need it for the actual hot chocolate bombs. DO NOT use water – that’s just weird. However, you can use any milk you’d like!
Dehydrated marshmallows or Mallow Bits can be found near the hot chocolate at the grocery store, not with the rest of the marshmallows. The high demand for them since Hot Chocolate Bombs started trending has made them really expensive to purchase online.
How To Make Hot Cocoa Bombs Step-By-Step Tutorial
Tempering Your Chocolate
You’ll want to begin by tempering your chocolate, this isn’t hard to do, it just requires some attention to detail and following the direction exactly.
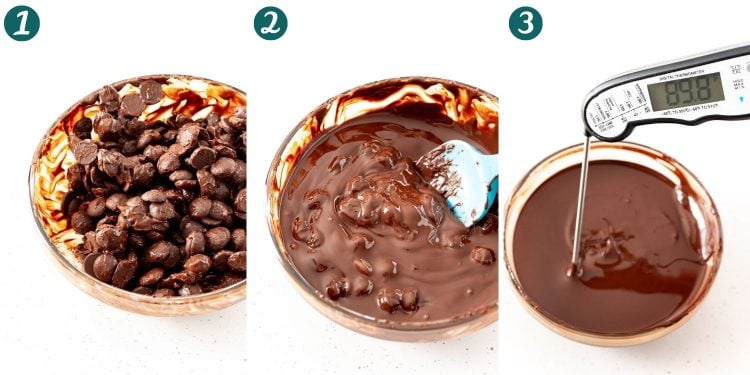
- Microwave the finely chopped chocolate or morsels in a medium microwave-safe bowl for 30 seconds. Use a rubber spatula to stir the chocolate even though it’s not super melty, it’s important.
- Continue to microwave at 15-second intervals until almost all of the chocolate has melted. Once you have just a few soft lumps, stir the chocolate until it is fully melted. If they just won’t melt, you can microwave for an additional 5 to 7 seconds.
- Use your thermometer to make sure the chocolate reads between 88 and 90 degrees F. If it’s over 90, add in the other ounce of chocolate and stir until melted.
To test if your chocolate is tempered or not, you can smear a bit on a piece of parchment paper and place it in the refrigerator for a few minutes. If it’s shiny and snaps in half when you take it out then your chocolate is tempered, if it bends then it’s not.
Making The Shells
Once your chocolate has been tempered, it’s time to make the shells for your hot cocoa bombs.
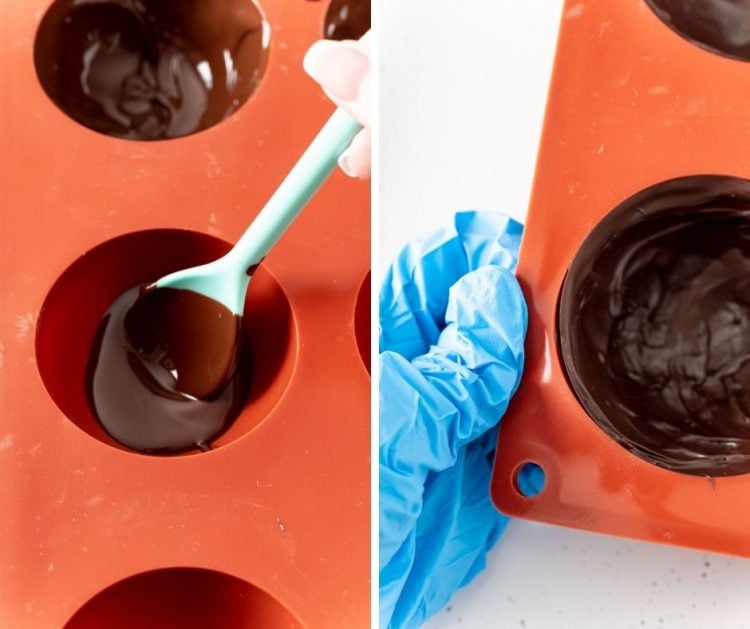
- Use a small spoon or brush to coat each well of your mold with melted chocolate. Chill in the refrigerator for 5 minutes.
- Add a second coat of chocolate and freeze for 10 minutes, then carefully remove the chocolate shells from the mold.
- Repeat this process if making a second batch.
How To Assemble:
You’re almost done! Once your shells are completed, it’s time to assemble the hot chocolate bombs.
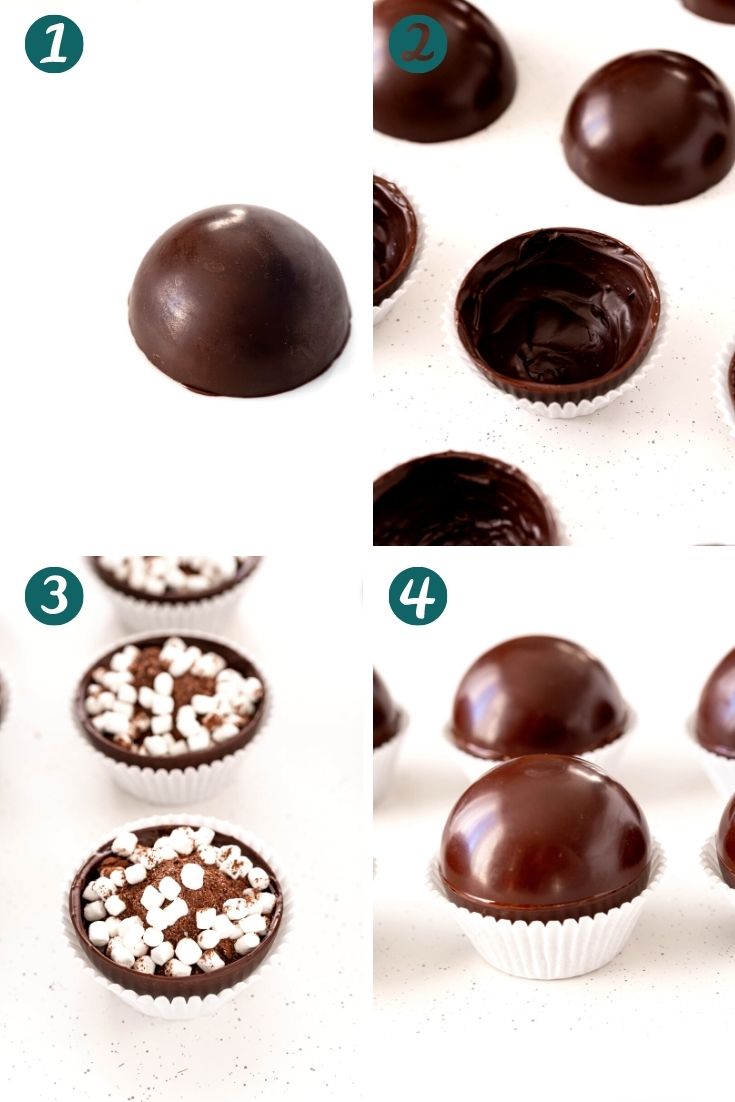
- Microwave a flat plate and place half of the shells rim side down on the plate one at a time and use a gloved hand to rotate them to melt the rim.
- Place them in cupcake liners to hold them upright.
- Fill the chocolate shells with hot cocoa mix and marshmallows.
- Reheat the plate and repeat the melting process with the other half of the shells and then gently place them on top of the filled shells and lightly press to seal. Let cool completely.
How To Serve
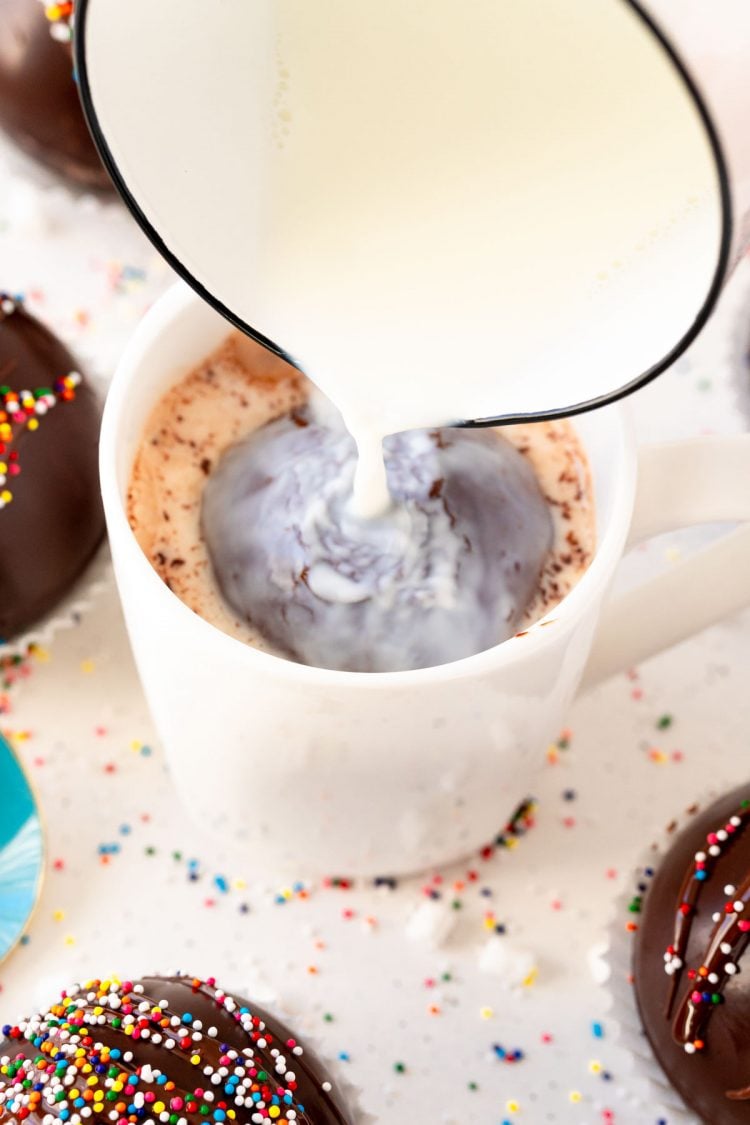
When you’re ready to enjoy your hot chocolate bombs, simply drop one in a large mug and pour steaming milk over the top and stir until fully melted. Add more marshmallows, whipped cream, or sprinkles if desired.
Ideal Serving Temperature
Cocoa butter begins melting at 93 degrees F, but the bombs themselves are rather large and will cool down the milk quite a bit. I recommend heating the milk to 160 degrees F with a serving temperature of 135 degrees F for adults and 120 for children.
I spent days in the kitchen testing these because I wanted to make sure that I was providing the best recipe possible! These are some questions I thought might pop up for some of you while making these.
If you have additional questions that aren’t covered in the post, please leave a comment!
Can I Use Other Kinds Of Chocolate?
Absolutely! Just note that different chocolates reach a tempered state at different temperatures.
- Dark Chocolate & Semi-sweet: Tempered between 88 and 90 degrees F.
- Milk Chocolate: Tempered between 86 and 88 degrees F.
- White Chocolate: Tempered between 82 and 84 degrees F.
Tempering only applies to chocolate, you do not need to worry about specific temperatures if using candy melts or chocolate melting wafers.
Can I Use A Different Mold?
While I have only made these with spheres, hearts and other shapes are becoming more popular. I think any silicone mold would work fine.
If you’re using a sphere mold, just make sure the one you’re using is between 2 and 2 3/4-inches in diameter so they can hold enough cocoa and marshmallows.
Why Are My Shells Chalky?
This is what happens when the chocolate hasn’t been properly tempered. Make sure you follow the detailed instructions in the printable recipe below. Make sure your mold is clean and completely dry before use.
Why Does This Recipe Have More Cocoa Mix Than Others?
A lot of recipes only use 2 teaspoons to 1 tablespoon of hot chocolate mix. I used 1oz. packets and the mix measures at 3 tablespoons per pack and calls for 6 ounces of milk. However, you also need to account for the chocolate in the shell and that’s why I recommend 8 ounces of milk for best results.
How To Store Hot Chocolate Bombs
These are best consumed within a few days. However, they can be stored for up to 2 weeks in an airtight container in a dry cool place.
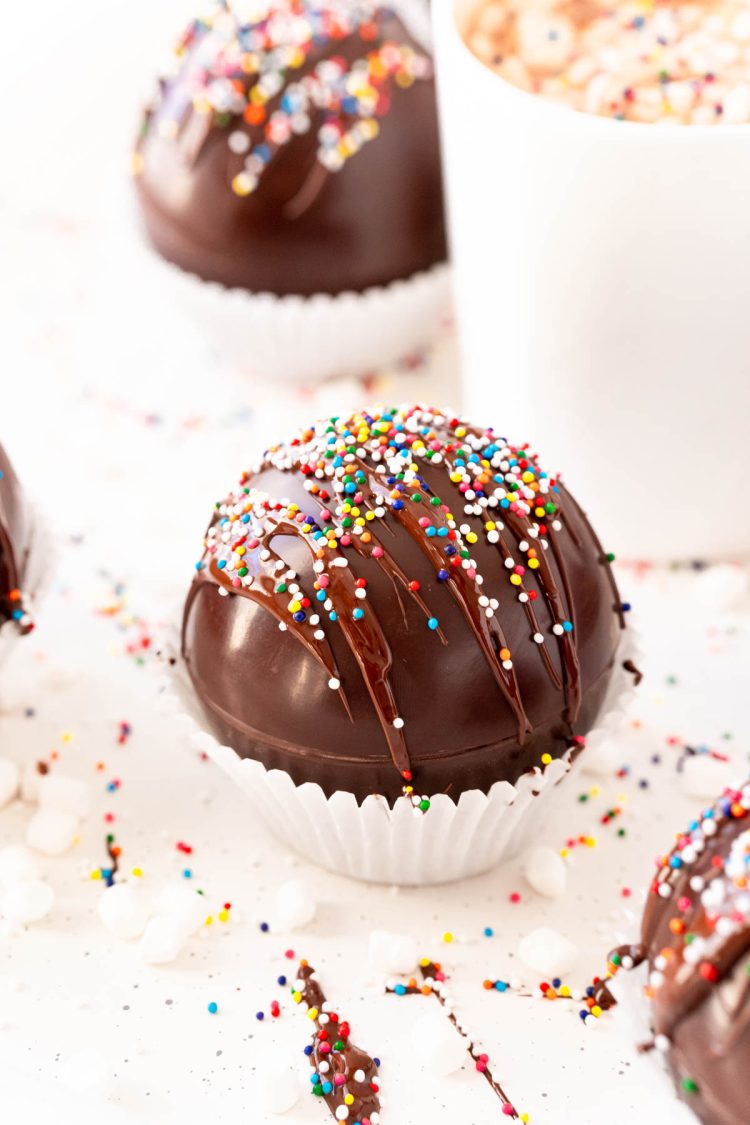
Hot Chocolate Bomb Variations
And there you have it, everything you need to know about making Hot Cocoa Bombs at home! Wasn’t that fun? There are so many fun ways to customize these confections! Here are a few ideas:
- White Chocolate – Use white hot chocolate mix.
- Mint – Use mint hot cocoa mix and Andes candies or go peppermint with crushed candy canes!
- Salted Caramel – Use caramel hot cocoa mix and a caramel drizzle and sprinkle of sea salt.
- Strawberry – use white or dark chocolate and strawberry milk powder.
Plus so many more? What flavor would you like to make?
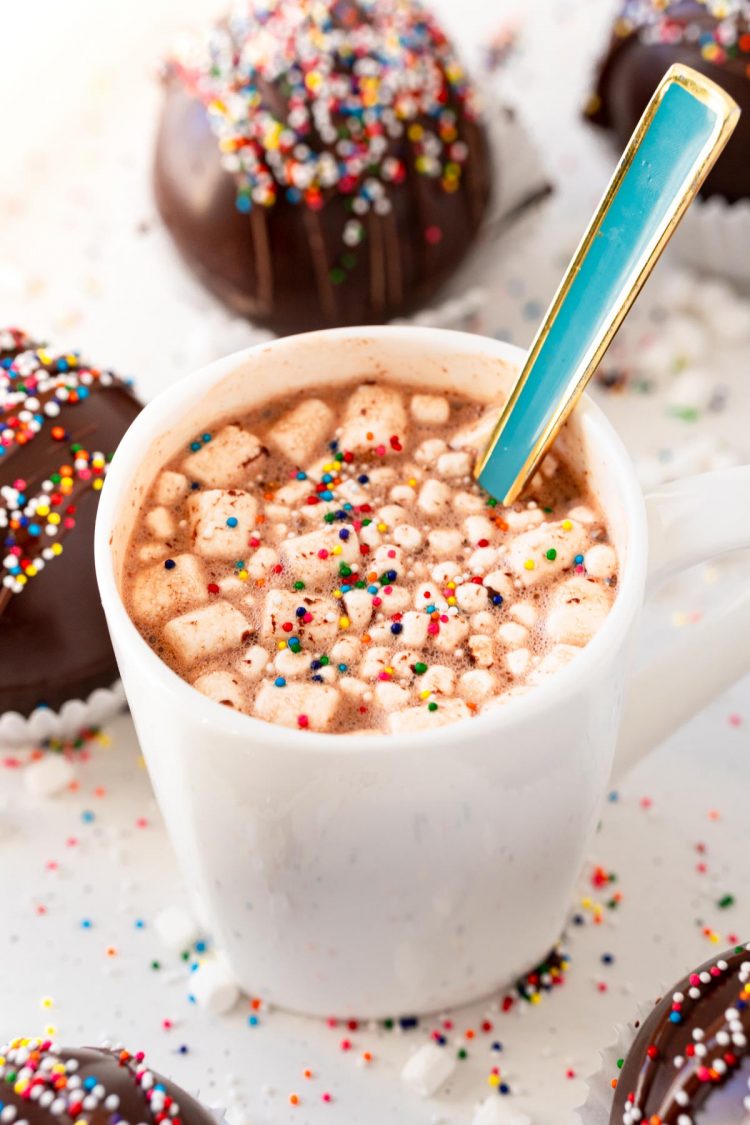
Looking for a more traditional hot chocolate recipe? Try my thick and rich French Hot Chocolate or this decadent Nutella Hot Chocolate!
Hot Chocolate Bomb
Click the button above to save this delicious recipe to your board!
Let’s Connect!
If you’ve tried this recipe, please let me know how you liked it in the comments below and leave a review. I love hearing from you!
Don’t forget to tag me – @sugarandsoulco – on Instagram and Pinterest with your photos or join our Sugar & Soul Show-offs Community and share them there, where you can join our recipe challenges!

Hot Chocolate Bombs
Equipment
- Silicone mold – I used a 2¾-inch half sphere
- Instant read kitchen thermometer
- Nitrile food prep gloves
- Food scale
- Spoon or food-safe paintbrush
- Rubber Spatula
- Small/medium bowl
- Small baking sheet
- Cupcake liners
Ingredients
- 12 ounces couverture chocolate morsels or finely chopped high-quality chocolate such as Ghirardelli baking chocolate divided – see notes
- 6 hot chocolate mix packets between .85 oz. and 1.25 oz. In size
- 1 cup Mini marshmallows
- Sprinkles optional
- 8 ounces whole milk or milk of choice for serving
Instructions
- Add 5 ounces of chocolate to a medium bowl and microwave for 30 seconds, remove and stir fully and scraping down the sides of the bowl with a rubber spatula, then continue to microwave at 15-second intervals, stirring and scraping between each one, until almost completely melted. Continue to stir so that the heat of the chocolate melts the unmelted pieces. Check the temperature to make sure that the chocolate reads between 88 and 90 degrees F. If it goes over 90 degrees, stir in an additional ounce of chocolate until melted to bring it back down to 88 to 90 degrees. If you are using two molds, you can do 10 ounces then add in 2 ounces, if needed. You don’t want that chocolate to sit too long and have to be reheated again if you only have one mold. If you do not temper the chocolate with a thermometer and this process, the chocolate can turn out chalky or discolored instead of shiny.
- Spoon about 1 tablespoon of melted chocolate into each mold and use the back of the spoon to spread it around, make sure to coat as evenly as possible and taking special care around the top and not leave any exposed areas. Place the mold on the small baking sheet and refrigerate for 5 minutes.
- Remove from the refrigerator and spoon another heaping spoonful into the molds one at a time – do not add chocolate to each cavity at once because it will start to cool too quickly and become thick, gritty, and hard to work with. Use the back of the spoon to work the second layer of chocolate around making sure to build up the rim, you want a slightly thicker edge to ensure they don’t crack. Freeze for 10 minutes.
- Remove from the freezer and put on the food-safe gloves and gently remove the chocolate shells from the molds. Repeat steps 1 through 4 if using a single mold.
- Once all of your shells are made, microwave a flat plate in the microwave for 2 minutes, then place 6 of the 12 halves on the plate one at a time using a gloved hand to gently spin them to smooth the edges then place round side down in a standard-sized cupcake liner on your work surface. Wipe the plate off after all 6 are done.
- Fill each of the half spheres in the cupcake liners with a packet of hot cocoa mix and marshmallows if desired.
- Reheat the plate for 2 minutes in the microwave. Then repeat the process with the other 6 halves and place them on top of the cocoa filled halves and gently press to seal.
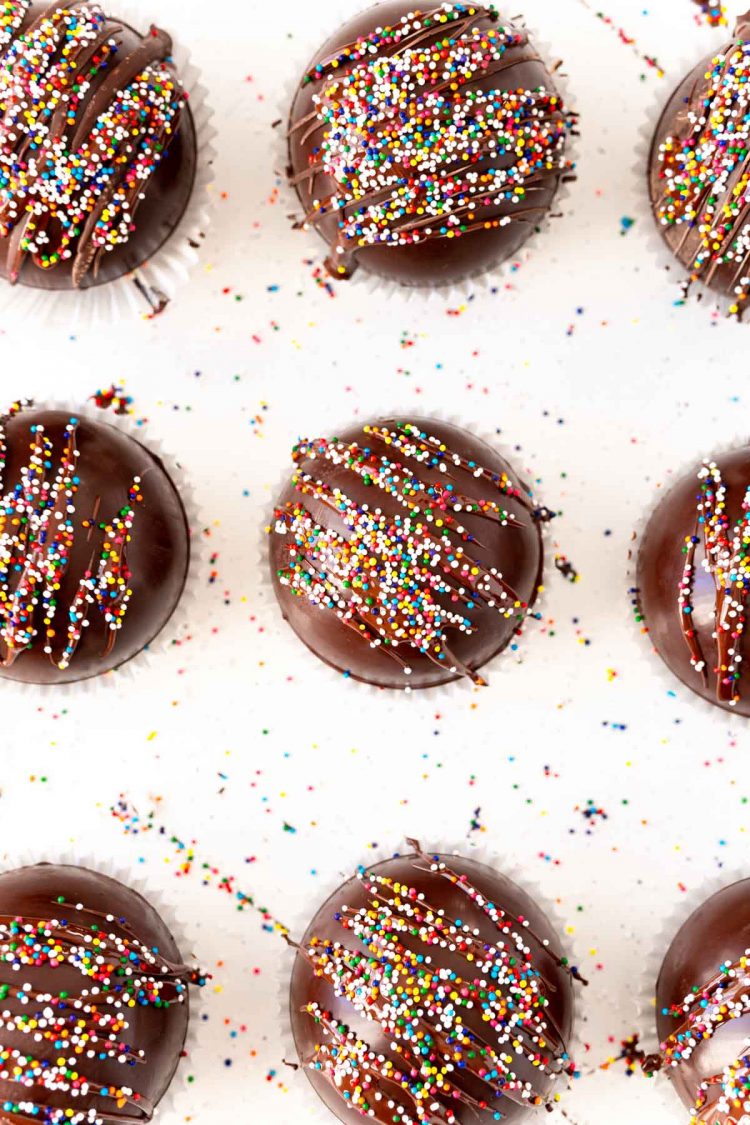
- Let the hot chocolate bombs set for a few minutes then top with a drizzle of chocolate and sprinkles if desired.
- To make hot chocolate, heat the milk in a small saucepan over medium heat just until the edges begin to bubble – the ideal temperature for the milk is 160°F – then remove and pour over a hot chocolate bomb in a large mug and stir until fully mixed.
Notes
- Nutritional information is an estimate and does not include milk for serving.
- To test if your chocolate is tempered or not, you can smear a bit on a piece of parchment paper and place it in the refrigerator for a few minutes. If it’s shiny and snaps in half when you take it out then your chocolate is tempered, if it bends then it’s not.
- Cocoa butter begins melting at 93 degrees F, but the bombs themselves are rather large and will cool down the milk quite a bit. I recommend heating the milk to 160 degrees F with a serving temperature of 135 degrees F for adults and 120 for children.
- Different kinds of chocolate temper at different temperatures
- Dark Chocolate & Semi-sweet: Tempered between 88 and 90 degrees F.
- Milk Chocolate: Tempered between 86 and 88 degrees F.
- White Chocolate: Tempered between 82 and 84 degrees F.
- If using white chocolate, you’ll want to increase the amount of chocolate to 16 ounces, starting with 7 ounces and an additional 1 ounce to retemper if needed per batch of 3.
- These are best consumed within a few days. However, they can be stored for up to 2 weeks in an airtight container in a dry cool place.
- A lot of recipes only use 2 teaspoons to 1 tablespoon of hot chocolate mix. I used 1oz. packets and the mix measures at 3 tablespoons per pack and calls for 6 ounces of milk. However, you also need to account for the chocolate in the shell and that’s why I recommend 8 ounces of milk for best results.
- While I have only made these with sphere-shaped molds, hearts and other shapes are becoming more popular. I think any silicone mold would work fine. If you’re using a sphere mold, just make sure the one you’re using is between 2 and 2 3/4-inches in diameter so they can hold enough cocoa and marshmallows.
- Dehydrated marshmallows or Mallow Bits can be found near the hot chocolate at the grocery store, not with the rest of the marshmallows. The high demand for them since Hot Chocolate Bombs started trending has made them really expensive to purchase online.
- Another option for sealing the molds is to pipe a thin line of chocolate around the rim of the filled cup and then top with the other half and roll the melted chocolate in sprinkles. But I much preferred the look of the plate method.
- Gloves can help not leave fingerprints on the spheres, however, be sure not to grab the hot plate with your gloved hand and then touch the spheres or it will leave a mark.
- Silicone molds have a tendency to attract lint, so I would avoid drying them with a dishcloth. Instead, let them air dry or pat with a paper towel.
- If using chocolate bars, you want them to be super finely chopped, you could even put them in a food processor or blender. You want the pieces to be small so that they melt quicker and more evenly.
- If you just want to make a set of 3, then 6 ounces of chocolate should be enough and if they want to do more, just add 6 ounces of chocolate for every set of 3.
Nutrition
Did You Make This Recipe?
Don’t forget to share it with me on Instagram @sugarandsoulco and follow on Tiktok @sugarandsoulco and Pinterest @sugarandsoulco for more!


Share your thoughts!
Love this recipe? Share your thoughts with me below and leave a review! And don’t forget to connect on your favorite social platform below!